You are responsible for knowing all the CLI commands in this lab.
By the end of the lab, you should be able to navigate your OS’s file system, manage files and directories, manipulate text files, and utilize process management commands.
Pro tips before you get started
Mega important:There is no notion of “undo”, a “trash can”, or a “recycle bin” in the CLI. You run a command, it’s done. So you have to be careful when you do things like delete or move files in the CLI.
Press the Tab key to autocomplete the command or filename you are typing. Big time saver.
Use the up arrow on your keyboard to cycle through the most-recently used commands you typed in. Good for re-running things.
Program going crazy and the CLI is not responding? Stuck typing and can’t get out? Press Control+C or Command+C. This sends a signal to the OS to kill the running process.
Class introduction
1 - Launching a Terminal
The terminal is the program that lets users access an OS’s Command Line Interface (CLI).
Launching a terminal on Mac
The terminal program on Macs is simply called “Terminal”. You can open it in two ways:
Finder → Applications → Utilities → Terminal
Press Command+Spacebar. Type “terminal” in the Spotlight Search popup and you will see an option to open the Terminal.
CMD+Spacebar is a great way to open apps quickly on Mac.
You may wish to drag the Terminal application to your Dock at the bottom.
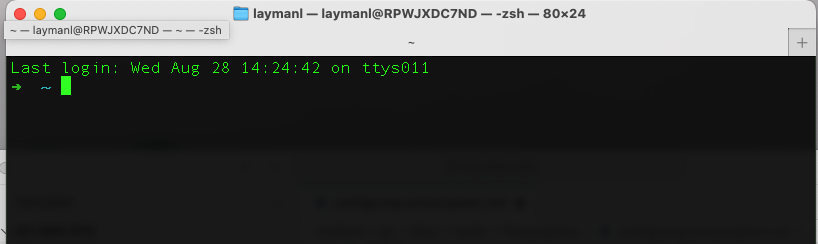
The terminal on Mac will look something like this.
Windows
Windows has several terminal programs. Windows PowerShell and Command Prompt are for interacting with Windows CLI directly. We want to open an Ubuntu terminal for interacting with the Ubuntu OS you installed in the previous lab.
This is PowerShell. The rest of the CLI labs assume you are using PowerShell on Windows as it allows for more *nix style comamnds than the old-school Command Prompt.
Course Note: You need to know terms and concepts that look like this.
Directories hold files and other directories. When you use the term subdirectory, you are talking about the directories listed inside the current working directory.
Files represent programs, pictures, audio, video, word processing docs, etc. Files can be run by the operating system (in the case of programs) or opened by another piece of software, like Photoshop, Microsoft Word, or Python.
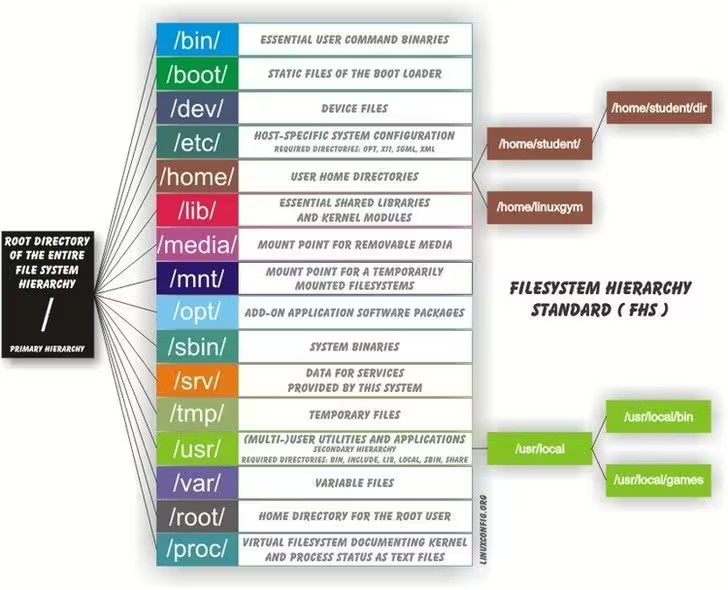
The file system has a root directory. On Mac (and Linux), this directory is named /. On Windows, it is typically C:\.
Mac & Linux uses forward slashes (/), whereas Windows uses backslashes (\). Use forward slashes (/) when in POwerShell and it will automatically transform them. Most software programs use /.
A user’s home directory is where their user-specific content lives, like documents and pictures that you save. On your personal computer, you probably only have one user. A lab machine will have many different users.
On Linux, the home directory for the user named ‘alice’ is /home/alice/
On Mac, it would be /Users/alice/
On Windows, it would be c:\Users\alice\
You can use the Terminal/CLI to navigate the file system, like you would graphically using the Windows Explorer or Mac Finder. As you navigate with the CLI, you are “in” one directory at a time. The directory that you are currently “in” is called the working directory. Commands run in the context of the working directory.
Explore the root directory using the ls and cd commands.
Open a Terminal for Mac or PowerShell for Windows.
Type in the following CLI commands one at a time and see what happens. The commands below have a # character, which indicated the beginning of a comment. # comments are there for clarification and you do not type them.
pwd# Print the path of the working directory.ls # List the files in the current directory.cd .. # Go "up" one level in the file tree.pwd# Print the path of the working directory.ls # This should now list different things.ls / # List the files in the root.cd / # Change working directory to root.ls # list files.cd .. # Go up... But it won't go anywhere because you can go higher!ls # You're still in the root. List root's files.
None of these commands change anything on your computer. They give you information and let you navigate between directories.
Mac users: If you encounter a Permission Denied error while running the ls / or cd / commands, try running sudo ls / or sudo cd /. It will prompt you to enter your password. The sudo command makes you an “administrator” in the eyes of the CLI. Mac is protecting the sensitive / directory, and wants to make sure you have permission to do what you’re trying to do.
Key Commands
pwd - Print Working Directory - what is the name of the directory you are currently “in”. Use then when you don’t know where you are.
ls - List contents. Will show both subdirectories and files in the working directory.
ls <target> - List the contents of target directory, e.g., ls /usr/
ls -l (Mac only) - Lists contents and gives you additional information, like the file type. May also do ls -l <target>
ll (Mac only) - Shorthand for ls -l. Can do ll <target>
cd - Change Directory. This is how you navigate.
cd / changes to the root directory
cd ~ or simply cd will navigate to the user’s home directory.
cd .. go “up” one level to the parent of the current directory
cd <target> changes to the <target> directory.
You can “jump” directories by putting the directories full name, like ls /usr/bin/. A directory’s full name is called its path.
You can also specify relative paths, which we will discuss more later.
The terminals are capable of autocompleting. Type cd to change to your home directory, then type cd D then hit the Tab key. What happens? The terminal will find all subdirectories (if any) of your working directory that start with capital D.
Extremely important point on Mac, Linux, and in most programs: file system names are case-sensitive. For example, you can have files named user.txt and User.txt and or a directory /usr/ and /Usr/ they are different. Capitalization matters in software development. Windows doesn’t care about capitalization (sometimes), but you should care.
Exercise:
(Mac) Navigate to the /usr/ directory.
(Windows) Navigate to the C:\Users directory.
Use the pwd command to display your current directory.
Type ls. What do you see?
(Mac only) Now type ls -l or ll. What do you see?
Use cd ~ to navigate to the home directory. Use ls to display the files and folders. What do you see?
Knowledge Check:
Question: What does the pwd command do?
Question: How do you navigate to the root directory?
Question: How do you navigate to your home directory?
By the end of the lab, you should be able to navigate the file system using the CLI, manage files and directories, manipulate text files, understand basic file permissions, and utilize process management commands.
Part 2: File and Directory Management
Reminder: All file system names a case-sensitive.
Now, let’s practice adding and removing files and directories using the CLI.
Creating and Removing Directories
mkdir - Make Directory
rmdir - Remove Directory
rm -r - Remove Directory and its contents recursively. WARNING: This is going to delete the directory and everything below it recursively. Linux does not have ‘undelete’, so be very careful with this command!
The commands below have a # character, which indicated the beginning of a comment. # comments are there for clarification and you do not type them.
cd# switch to your home directorymkdir MyLab
ls # You should see the new MyLab/ directory.cd MyLab
ls # You will not see anything. The directory is empty.cd ..
rm -r MyLab
ls # MyLab should now be gone
Creating, Copying, and Deleting Files
cp - Copy Files and Directories
rm - Remove Files
mv - Move or Rename Files
cd ~ # go to your home directoryls
touch sample.txt # Create blank filels
cp sample.txt sample_copy.txt
ls
mv sample.txt renamed_sample.txt
ls
rm sample_copy.txt
ls
cd ~# go to your home directoryls
echo "hello">sample.txt# create a text file containing the string "hello"ls
cp sample.txtsample_copy.txtls
mv sample.txtrenamed_sample.txtls
rm sample_copy.txtls
Exercise
Create a new directory named LabDirectory
Navigate into this directory using the cd command
Create a new file named LabFile.txt inside this directory. Use touch
Copy this file to a new file named LabFileCopy.txt. Use cp
Use the CLI to manipulate and print text files (like source code).
Part 3: Text File Manipulation
You can use the CLI to do simple or complex text manipulation. As developers, you will use an IDE like PyCharm or Visual Studio Code to do such tasks most of the time. However, it can be handy to do from the CLI sometimes. Many scripts used to compile and build software these CLI text-manipulation techniques.
Important concepts
Most CLI commands, including the ones you have already seen like ls and pwd have an output that is printed to the terminal. Some commands, like cp, do NOT have an output printed to the screen.
Below you will see the special > and >> operators.
> is the redirect operator. It takes the output from a command and writes it to a file you specify, e.g., echo "hello" > file.txt. It will create the file if it does not exist, and will overwrite the file if it does exist!
>> is the append operator. It will create the file if it does not exist, and will append to the end of the file if it does exist!
Viewing and Editing Text Files
echo - Display a line of text
cat - Concatenate and display file contents
more - View file contents one screen at a time
echo"Hello, CLI" > hello.txt
cat hello.txt
echo"Another line" >> hello.txt
cat hello.txt
seq 1110000 >> numbers.txt # making a big file - no need to learn. cat numbers.txt
more numbers.txt # Spacebar goes forward, b goes back, q to quit.
echo "Hello, CLI">hello.txtcat hello.txtecho "Another line">>hello.txtcat hello.txt1..10000|Out-Filenumbers.txt# making a big file. Don't worry about learning this command.cat numbers.txtmorenumbers.txt# Spacebar goes forward, b goes back, q to quit.
Exercise
Use echo to create a text file with some content. Try echo "this is my first file" > myfile.txt
Use cat will print all of the file’s contents to the screen all at once.
Use echo to append text to the file.
Use more to view the file content one screen at a time. Hit q to exit.
Knowledge check
Question: How can you append text to an existing file using echo?
Question: What command would you use to search for a specific word in a file?
We discussed what a process is when we introduced Operating Systems concepts. Below you will see a reference to PID - Process ID. This is an integer that uniquely identifies the process to the OS. As a user, you use the PID to specify which process you are talking about.
Run the following:
ps
top  # (Mac/Linux only) hit q or Control+C to quit the program.
Monitoring and Controlling Processes
ps - Report a snapshot of current processes
top - (Mac/Linux only) Display processes and how much memory or CPU they are using. Similar to the Activity Monitor on Mac and the Task Manager on Windows. Hit q to exit.
Use the keyboard combo Control+C to kill/quit the current process.
kill - Send a signal to a process
Exercise
We are going to install Python and create a wild task.
Open a second Termina by clicking the + button next to the tab in the menu of the current Terminal. You should see a second “fresh” terminal pane.
Now run python3 or python and create the following infinite loop. You can also do this in IDLE or other editor if having trouble running python from the command line.
python
whileTrue:print("hello there")
We should now have an out of control Python process gobbling up CPU cycles.
Switch back to the other Terminal tab and run the following commands.
ps
top # (Mac/Linux only) find the PID of the python process that is gobbling all the CPU# If using Windows, open the Task Manager programkill <PID> # Replace <PID> with the actual process ID
The terminal will not say anything, but run top again. The runaway Python process should be gone. Switch back to the Terminal tab where you had that Python process and it should say terminated or something similar.
Knowledge Check
Question: How can you view real-time process activity?
Conclusion
Anything you can do with your OS’s GUI, you can do on the command line. It just looks different. Become comfortable with the CLI – you will find that it can be MUCH faster for certain tasks, and will be indispensable to you as a software engineer.
Final Knowledge Check
Question: Summarize the steps to create a new directory, navigate into it, create a text file, and view it using less.
Question: From the CLI, how would you find the runaway process with a memory leak (probably using the most memory) and terminate it?
