for Mac
This lab is for those who are installing PyCharm on Mac machines.
Installation
Download PyCharm.
Locate the downloaded
.dmgfile and click to open. Drag PyCharm into the Applications folder.Open your Finder, select Applications, then PyCharm.
You may wish to pin PyCharm to your dock after launching.
Enable launching PyCharm from the Terminal
- Open the Mac Terminal application as described in the Launching a Terminal lab.
- In the Terminal, type the command
sudo nano /usr/local/bin/pycharm - Enter your password when prompted.
- You will now see the Nano text editor in your terminal. Type or paste in the following:
#!/bin/sh

open -na "PyCharm.app" --args "$@"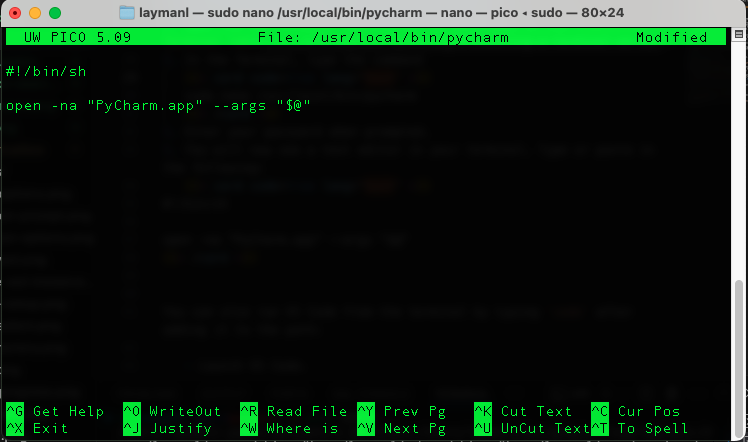
- Hit Control+O to save, then Enter to accept the filename.
- Hit Control+X to exit the text editor.
- Run the following command in the Terminal:
sudo chmod +x /usr/local/bin/pycharm
You will now be able to type pycharm . in the Terminal to open PyCharm to edit the current directory’s contents.
Test drive
We are going to create a sample project directory using the Terminal, then open PyCharm and edit files in that directory. A video follows the steps.
- Open the Terminal application.
- Run the following in the Terminal:The
cd ~ # make sure in your home directory mkdir seng-201 # This directory will hold all our code for the course cd seng-201 # change to the new directory mkdir pycharm-test # Make a new subdirectory for a test project. cd pycharm-test # change into the subdirectory pycharm . # launch PyCharm in the current directorypycharmcommand launches the PyCharm program. The commandpycharm .says launch Pycharm and have it open the current working directory. The symbol.always means the working directory. Sometimes it will be necessary to explicitly tell the CLI we are referring to the working directory; more on those situations as they arise. - A PyCharm window will open after a moment.
- You may be asked if you “trust the authors of the files in this folder”. Click the checkbox and then pick “Yes, I trust the authors.”
Here is the process in a video:
Creating a new file
Let’s create a file in the Terminal in our project directory. We should see it immediately in PyCharm.
- Go back to your Terminal and make sure you are in the
pycharm-testdirectory. - Type the command
touch hello.pyto create an empty Python file. - Go back to PyCharm. You should see the file
hello.pyin the directory here. Click on it and it will open an empty editor pane. - In the code editor, type
print("Hello World"). - Go back to the Ubuntu Terminal and type
cat hello.py. You should see the code.
Next
So you now have PyCharm successfully editing files and interacting with directories on Mac.
You are now ready to code! Move on to PyCharm Basics lab.