for WSL
This lab is for those who are on Windows and have set up the Windows Subsystem for Linux (WSL) following Option 1 from the Installing a *nix operating system lab.
Installation
- You must request a free PyCharm Professional license. Sign up using your
@uncw.eduemail address. - Download and install PyCharm for Windows. You must have Pycharm Professional, not the Community edition.
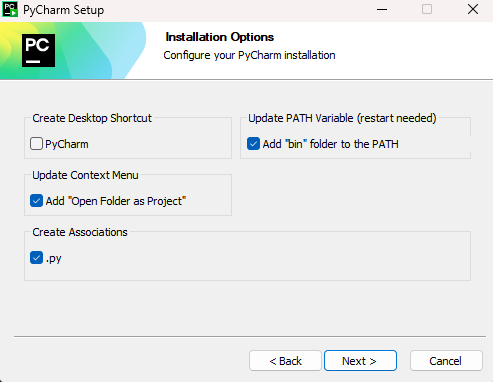
- Complete the install process. I recommend the options below, but they are not required:
Setup
- Run PyCharm after installation is complete.
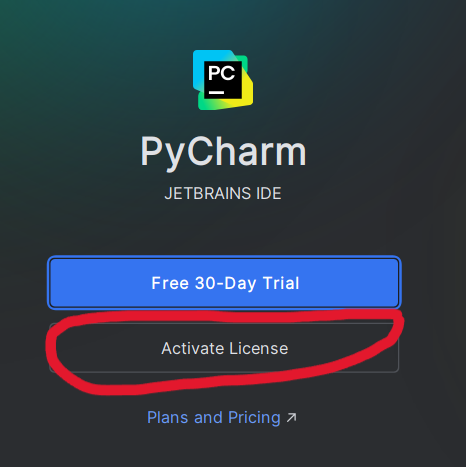
- You should see a prompt to activate the license. Select “Activate License” then “Log In to JetBrains Account”.
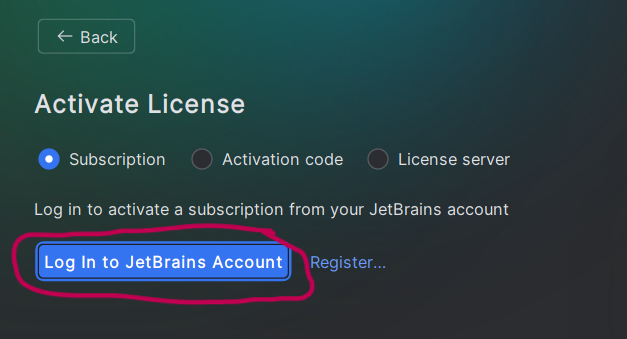
- Complete the login process using the Jetbrains website.
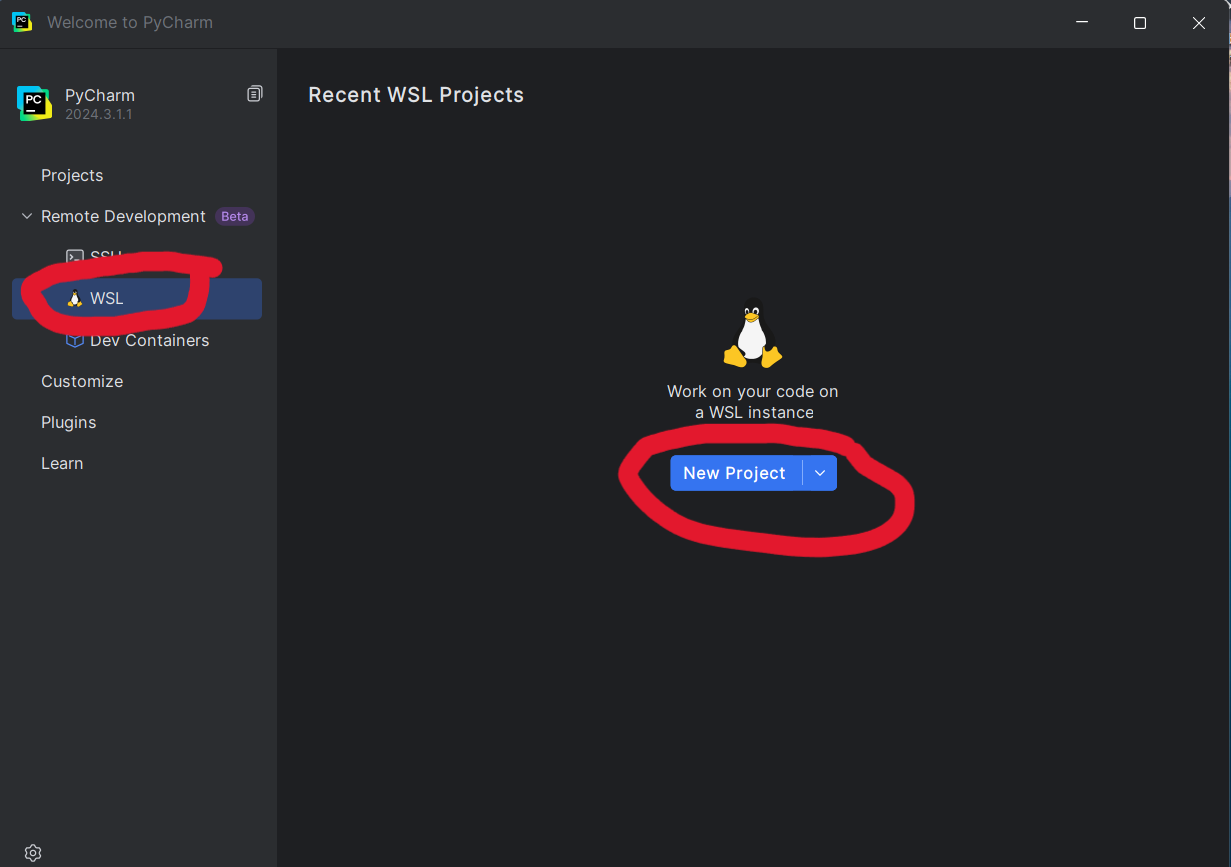
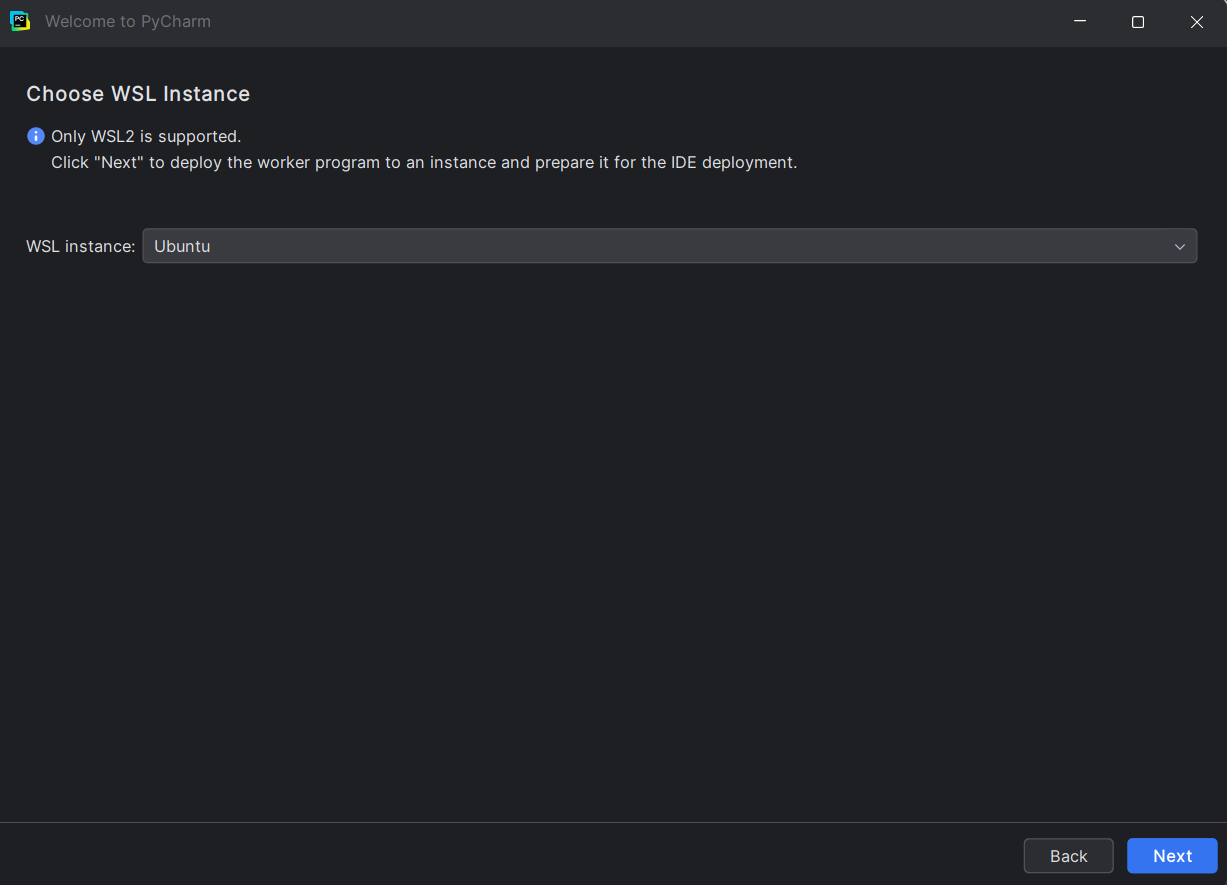
- You should now see a “Welcome to PyCharm” screen. Select “WSL” in the left pane, then click “New Project” in the main pane.
- You WSL instance you created should already be selected. Click “Next”.
- PyCharm will process for a minute then present a “Choose IDE and Project” screen. Leave the “IDE Version” as-is. Click the
...next to the “Project directory” selector.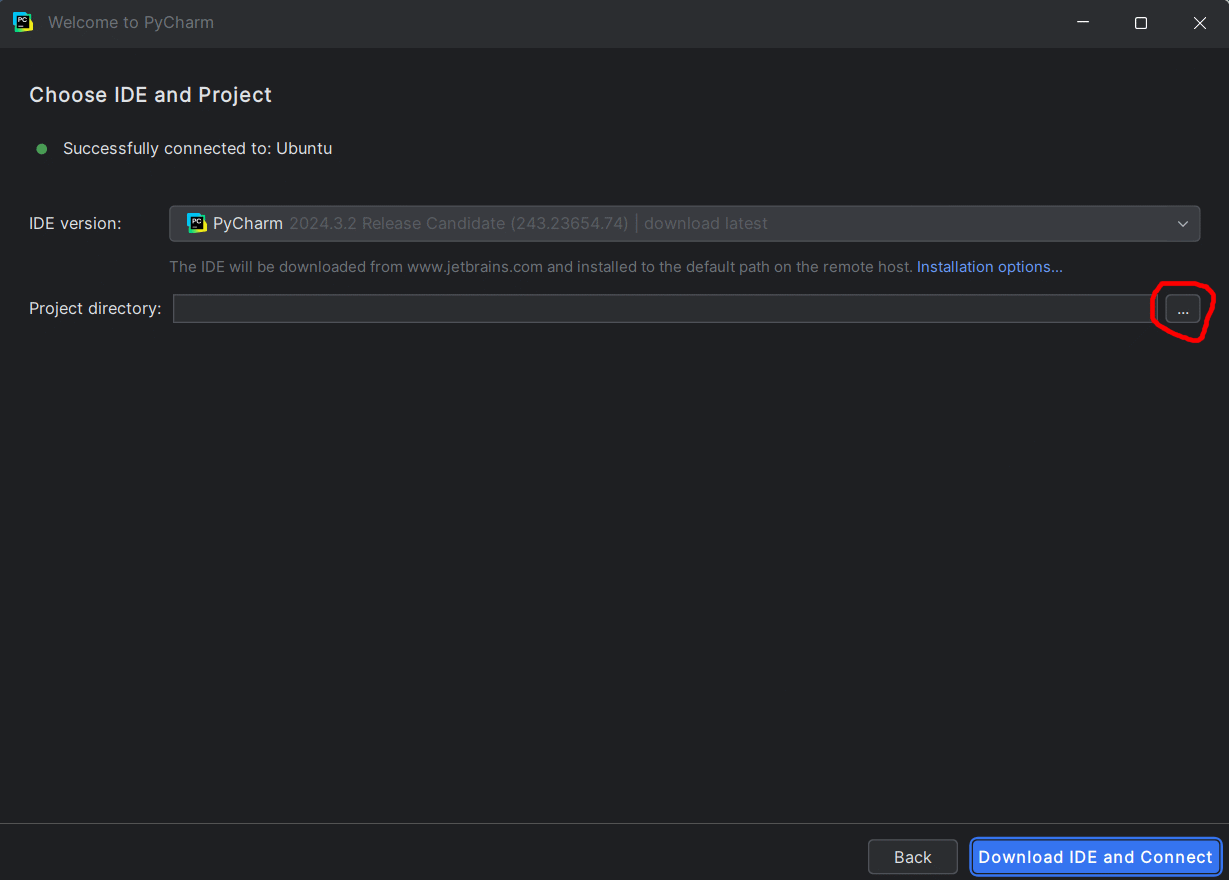
- We are now going to create a directory in Ubuntu to keep all your class projects. We will also create a new test subdirectory in that directory.
- In the pop-up, expand the directories to select
\\wsl.localhost\Ubuntu\home\<your_username>. Left click to select the directory. - Then click the “New Directory” button at the top.
- Then enter
seng-201in the pop-up name box.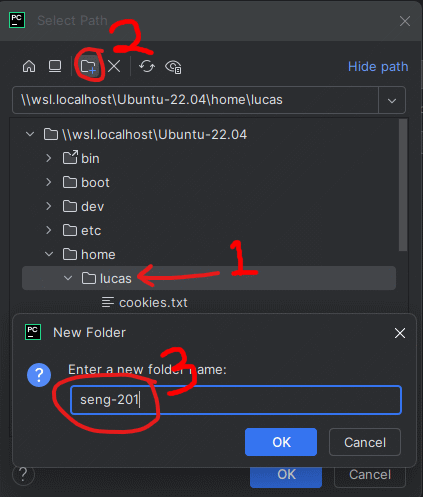
- Now select the
seng-201folder and click the “New Folder” button again. Enterpycharm-testin the box.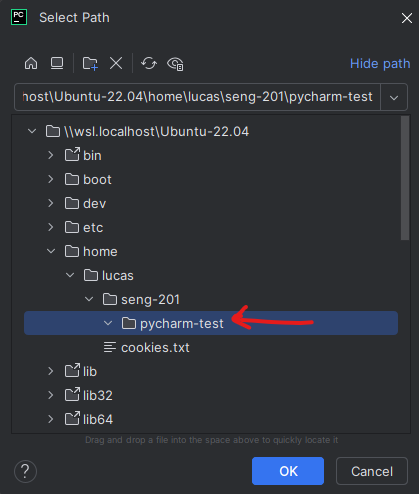
- Finally, select the
pycharm-testfolder and click “OK”.
- In the pop-up, expand the directories to select
- You will be back on the “Select IDE and Project” page. It should look like below. Click the blue “Download IDE and Connect” button.

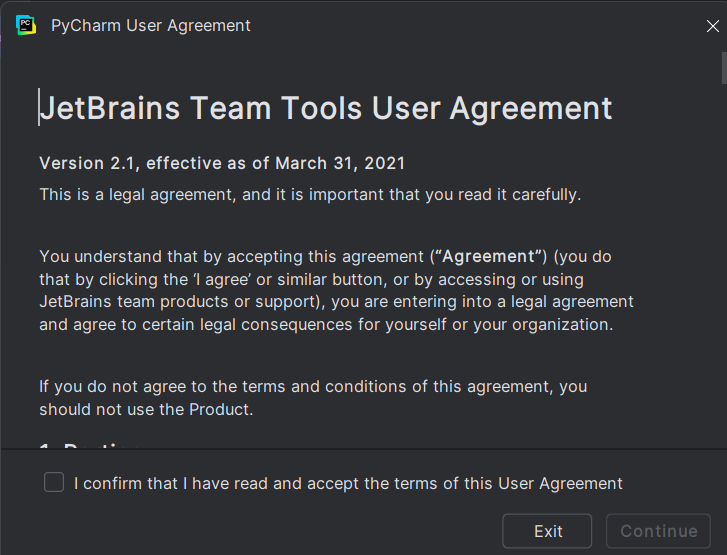
- PyCharm will take several minutes to download and configure necessary software to talk to your Ubuntu instance. After it completes, you will be shown a user agreement. Accept it.

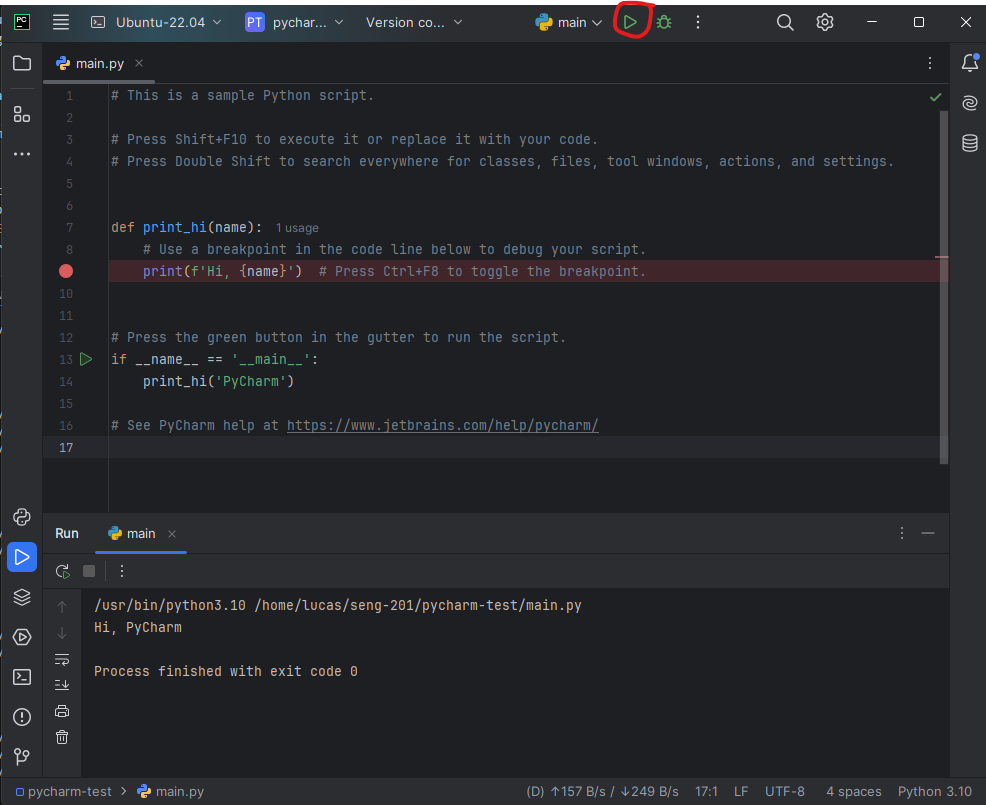
- Finally, you should see the PyCharm IDE editor window. Click the Play button at the top to see the Python program run. You are done with the setup.
You may see some Windows Firewall pop-ups. It is okay to allow them.
Configure the Ubuntu CLI
Finally, we are going to make it so you can open PyCharm from the Ubuntu CLI. This will be very convenient later.
- First, close PyCharm.
- Open an Ubuntu Terminal as described in the previous lab.
- Run the following command, which will create an alias to run PyCharm from the command line:
printf "pycharm() { \"/mnt/c/Program Files/JetBrains/PyCharm 2024.3.1.1/bin/pycharm64.exe\" \"\$@\" > /dev/null 2>&1 & }\n" >> ~/.bashrc && source ~/.bashrc
Test drive
Let’s open PyCharm from the Ubuntu CLI and do somet light editing.
Run the following commands from the Ubuntu terminal:
bashcd # make sure in your home directory cd seng-201 cd pycharm-test # change to test directory pycharm . # launch PyCharm in the current directoryPyCharm should open after a moment. You may see a prompt to “Trust the directory…”. Do that. You may need to click on the Explorer icon in PyCharm to see your files:
Go back to your Ubuntu terminal and make sure you are in the
pycharm-testdirectory.Type the command
touch hello.pyto create an empty Python file.Go back to PyCharm. You should see the file
hello.pyin the directory here. Click on it and it will open an empty editor pane.In the code editor, type
print("Hello World").Go back to the Ubuntu Terminal and type
cat hello.py. You should see the code.
Next
So you now have PyCharm successfully editing files and interacting with directories inside Ubuntu.
You are now ready to code! Move on to the PyCharm basics lab.