Working on ada
Class recording
The recording covers this lab and the previous lab on Server Setup as well as an introduction to Computer Networking concepts.
Part 1: Starting out
ada is running Ubuntu Linux, and understands all the standard Linux CLI commands. There are additional commands at your disposal, including python and git.
Make sure you are connected to ada using SSH. Type the following commands:
ll- what do you see?mkdir devcd devpwd
Briefly summarize what you just did.
Part 2: Editing a file
When connected to a server like ada, you typically only interface through the CLI. In ada’s case, there is no window-like GUI.
Linux uses the ~ character as shorthand for your home folder, i.e., /home/<your_id>. So ~/dev is shorthand for /home/<your_id>/dev.
Make sure you are in your ~/dev folder. Do the following:
nano hello.py- a text editor called Nano will open in the Terminal looking like this:

- type in
print("Hello World!") - Hit
CTRL+Xto exit, thenYto save the changes. - You will see the ada Terminal again. Type
lland you should see thehello.pyfile. - Run
python3 hello.pyand you should see your “Hello World” message.
The Nano editor is quite handy for editing files on the server quickly. But, we are spoiled by the ease-of-use of IDEs like Visual Studio Code and PyCharm.
Editing a full-blown program with many different files using nano would be painful. In practice, software engineers don’t do much, if any, editing on servers. Instead, software engineers develop on their own machines and deploy their software programs to servers.
Deploying software to ada
Deployment is the act of making your software available for use. You could deploy your software to your own computer (you do this while testing). For other people to use your software, you need to make your computer accessible via a network and make sure the program is running all the time and ensure that your computer has enough resources to handle thousands of people using it all at once.
Hence, servers. Servers are network accessible and all they do (usually) is serve software programs that users can connect to.
So, how can you get a program to ada? You can use file transfer tools like scp, but we will use git.
Initializing Git and GitHub on ada
We need to authorize your account on ada to clone your remote repositories. Do the following:
sshontoada.- Run
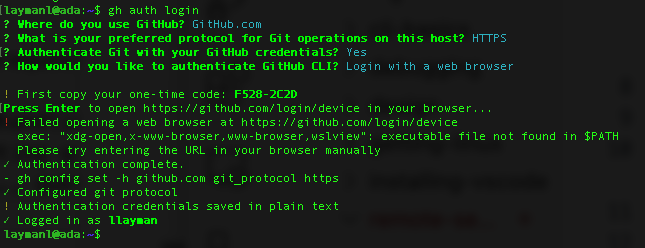
gh auth login. Accept the default options. - The step
Press Enter to open https://github.com/login/device in your browser...becauseadadoesn’t have a GUI.
- On your computer, open a browser to https://github.com/login/device and type in the 8-character code on
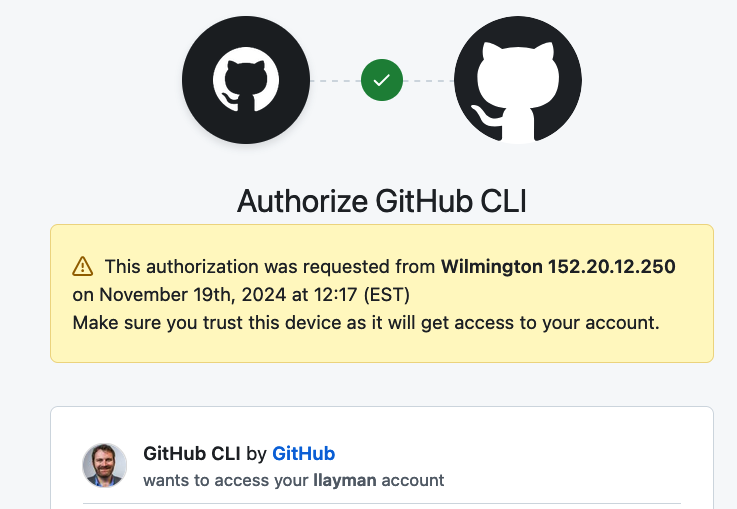
ada’s terminal. - In the browser, accept the authorization options:

- You should see in the
adaTerminal a “Logged in as” message. You are done. 
git clone a repository
You are now ready to use git on ada.
git cloneone of your existing remote repositories to your. You can use any of the ones from class or a homework assignment.- Use
python3to run your code. Does it work?
Suppose you are actively developing that Python project. How would you deploy the changes to the server?
You would develop the program on your PC, then commit and push to GitHub. Then ssh to ada, pull the latest version, and restart the program!
Most software deployed in this manner relies on the main branch of the repository. Hence why it is critical that main contain only “good, clean, working code” – main is what users will see!
Next
We will put a program on ada that is accessible via the network so that other people can use it.
Try browsing to http://152.20.12.250:23456/, but the app may not be running.