Location - On Demand
- Objectives
- Introduction
- Boilerplate
- Adding location support to your Flutter project
- Getting Ready
- Asking for Permission
- Obtaining location data
- Indicating progress
- Conclusion
- Completed Code
Objectives
- to obtain location coordinates on demand
- to build a more complicated stateful widget that gracefully handles multiple scenarios in a single screen.
Introduction
Smartphones are computers in your pocket, and portability is their hallmark. Apps use device location information to provide navigation instructions, targeted ads, and to record workout routines.
Location is usually reported as latitude and longitude pair in decimal degrees. For example, the UNCW Clock Tower sits are roughly 34.2271592 latitude,-77.8729786 longitude. This is often condensed to (34.2271592,-77.8729786)
There are three strategies for determining the location of a smartphone.
- Cell towers (least accurate)- your phone is signaling nearby cell phone towers. The phone companies know the latitude and longitude of these towers, and can trilaterate your location based on signal strength. The accuracy is generally very poor between 500-1500m.
- Wifi positioning (variable accuracy) - your phone is signaling nearby wifi access points. Some companies, like Google, have huge databases of where specific wifi access points are in latitude and longitude coordinates. Again, using trilateration, your phone can be positioned within 10m-25m depending on how many wifi points are nearby.
- GPS: Global Positioning System (most accurate) - GPS is a satellite constellation owned by the US military. Most smartphones (and other GPS-enabled devices) have a special circuit that receives the GPS satellite signals. It trilaterates signals from a satellite constellation owned by the US military. Assuming a decent GPS signal, location is accurate to around 3m.
Your Android or iPhone has native libraries that can help retrieve the device’s location using cell tower, wifi, or GPS positioning. But, deciding which to use can be quite complicated. There is a tradeoff between accuracy and power consumption. GPS is the most accurate, but consumes nearly as much power as having your screen on all the time. The native libraries Android and iPhone provide use algorithms that balance this tradeoff for you, and use some tricks like sharing recent positions between apps that need location information.
Privacy
Location information is private information, and many users are protective of their location data. You should only use location data if necessary. Both the Google and Apple app stores require you to document how you use location information, and require you to obtain special user permission to collect location information when your app is in the background.
In this lab, we will demonstrate how to obtain your phone’s location on-demand, for example, like when you want to record the location of a favorite place.
Boilerplate
Create a new Flutter project from the Command Palette (View -> Command Palette) named location_sampler. Add the following files to your project lib/ folder:
- main.dart
- on_demand.dart - we will do most of the work here
- streaming_loc.dart - we will build this out in a future lab
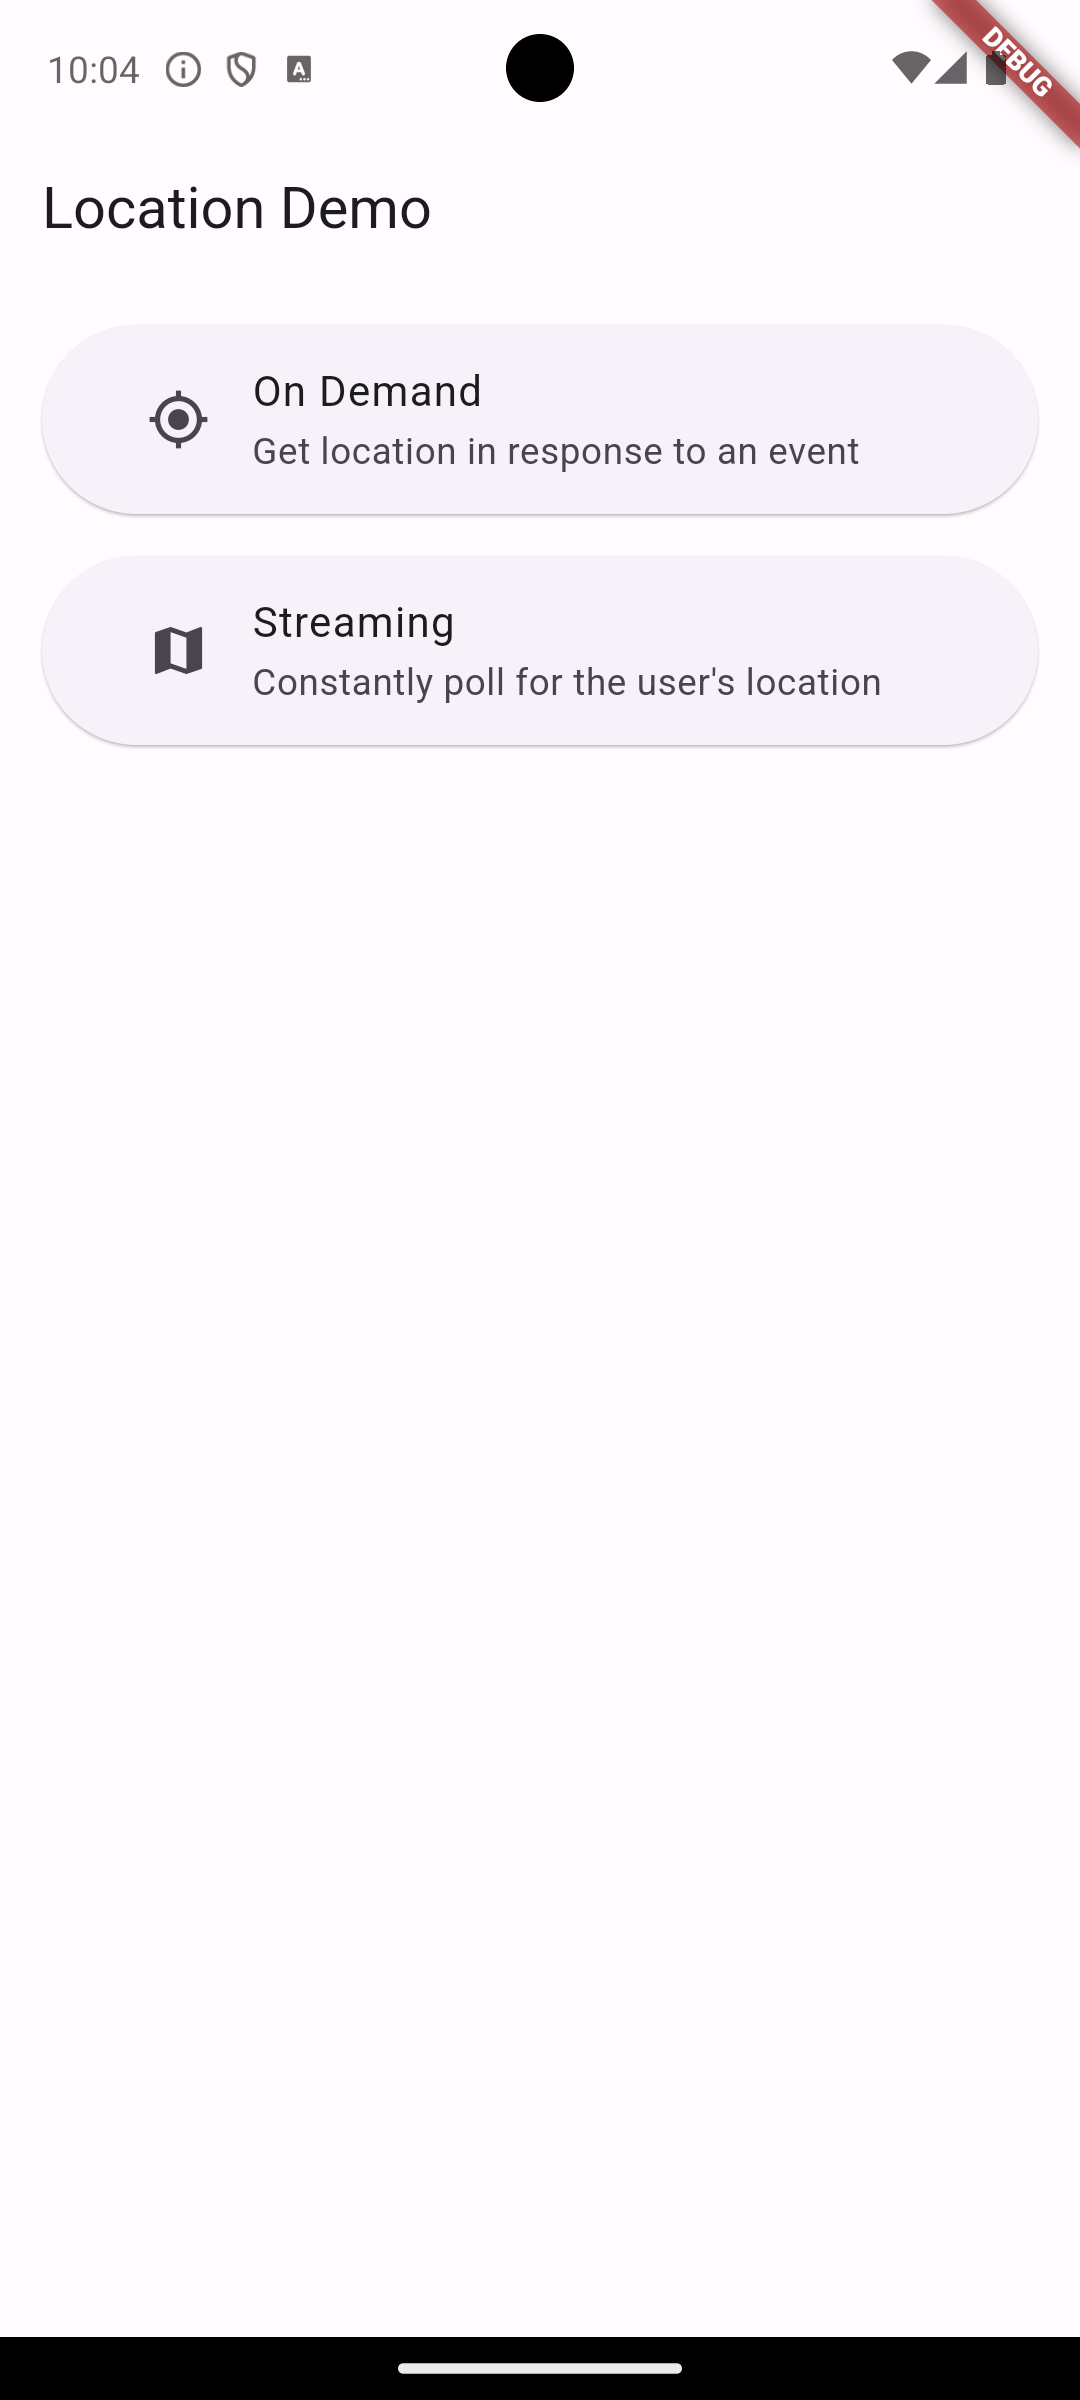
You should see a home screen like the following:
Adding location support to your Flutter project
Flutter does not provide location support libraries out of the box. We must rely on third-party libraries instead. We will use the geolocator library, which is popular and actively maintained.
- Open
pubspec.yamland add the linegeolocator: ^13.0.4to thedependenciessection. - Save the file, which should prompt VS Code to download the library.
- Open the Command Palette and run “Pub: Get Packages” for good measure.
For Android
- For
geolocatorto work on Android, open the fileandroid/app/build.gradle.ktsand change the linendkVersion = flutter.ndkVersoonto
ndkVersion = "27.0.12077973" - Next open
android/app/src/main/AndroidManifest.xml. Add the following line between the<manifest ...>tag and the<application ...tag near the top.
<uses-permission android:name="android.permission.ACCESS_FINE_LOCATION" />
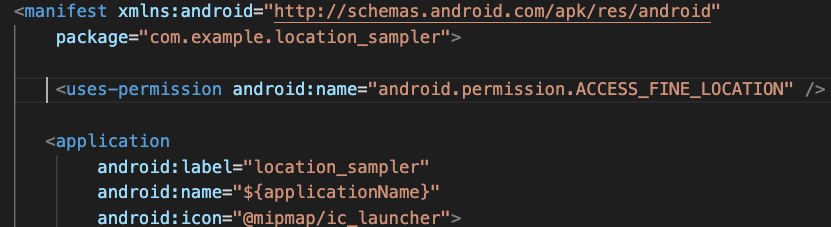
This effectively warns Android that your app plans to request location information. Android would deny you access to location information if you didn’t put this in. Now, Android will require you to ask the user for permission to gather location information.
For iOS
- Open the file
ios/Runner/Info.plist. Add the following inside the<dict>tag near the top:
<key>NSLocationWhenInUseUsageDescription</key>
<string>This app needs access to location when open.</string>

- Open the file
ios/Podfile. At the bottom, change:
post_install do |installer|
  installer.pods_project.targets.each do |target|
    flutter_additional_ios_build_settings(target)
  end
end
to
post_install do |installer|
  installer.pods_project.targets.each do |target|
    flutter_additional_ios_build_settings(target)
    if target.name == "geolocator_apple"
      target.build_configurations.each do |config|
        config.build_settings['GCC_PREPROCESSOR_DEFINITIONS'] ||= ['$(inherited)', 'BYPASS_PERMISSION_LOCATION_ALWAYS=1']
      end
    end
  end
end
For web, and other platforms
Refer to the Usage instructions here for configuring other platforms.
Getting Ready
On this screen, the plan is to have:
- a button at the top that the user clicks to “get position”
- a list of the positions the user has obtained in a ListView
- a “clear” button to reset the list.
Let’s get the framework in place to show that now that we have added the geolocator to our project. Change on_demand.dart to the following:
import 'package:flutter/material.dart';
import 'package:geolocator/geolocator.dart';

class OnDemandScreen extends StatefulWidget {
  const OnDemandScreen({super.key});

  @override
  State<OnDemandScreen> createState() => _OnDemandScreenState();
}

class _OnDemandScreenState extends State<OnDemandScreen> {
  List<Position> positions = [];

  @override
  Widget build(BuildContext context) {
    return Scaffold(
      appBar: AppBar(title: const Text("On Demand Location")),
      body: Center(
        child: Column(
          children: [
            ElevatedButton(onPressed: () {}, child: const Text("Get Location")),
            if (positions.isEmpty)
              const Expanded(child: Text("No positions yet.")),
            if (positions.isNotEmpty)
              Expanded(
                child: ListView.builder(
                  itemCount: positions.length,
                  itemBuilder: (context, index) => Padding(
                    padding: const EdgeInsets.all(8),
                    child: Text(
                        "${positions[index].latitude} ${positions[index].longitude} ${positions[index].accuracy}"),
                  ),
                ),
              ),
            ElevatedButton(
              onPressed: () => setState(() => positions.clear()),
              child: const Text("Clear"),
            )
          ],
        ),
      ),
    );
  }
}
Your “On Demand Location” screen should now look like this:

Nothing is functional on the screen yet. A few things to note:
- We have imported the
geolocator.dartpackage. - We have created an empty list state variable called
List<Position> positionswhere we will collect the location records. The Position class comes from thegeolocatorpackage and contains several variables:- latitude: double
- longitude: double
- accuracy: double - an error estimate of the position, e.g., an error of 3 meters.
- speed: an estimate of how fast the user is traveling. This is not available on all devices.
- altitude: an estimate of how high the user is above sea level. This is not available on all devices.
- there is a
ListView.builder()widget that will produce a line of Text for each Position in thepositionsstate variable. - if the
positionsstate variable is empty, the screen displays “No positions yet” instead of the ListView
The next step is to make that “Get Location” button get our location, but first, we have to ask for permission…
Asking for Permission
Permissions are the general term for granting an app access to potentially sensitive information on your phone. You probably have seen screens similar to the one below:

Apple and Android want app users to be aware that apps are accessing potentially sensitive data. Consequently, the operating system blocks access to certain resources until the app asks for and obtains the user’s express consent.
In general, your app should only ask for sensitive data that it needs to do it’s job. Both iOS and Android provide extensive requirements and guidelines and accessing sensitive data. If you publish your app on one of the app stores, you will have to attest (under penalty of law) as to how you are using this data. Protected data includes:
- Location
- Contact list
- Camera
- Microphone
- SMS or Calling
- Files on the device
One important nuance of permissions is that users can change permissions at any time. Users can go into the Android or iOS Settings and remove app permissions from there, not just inside your app. So, you cannot assume that just because you obtained permission once, that those permissions are still in place. Thus, you must always check if you have permission in every block of code that accesses protected data.
Obtaining location data
The geolocator library will take care of the complex logic of obtaining location data for us. Most of the logic we need to concern ourselves with in Flutter is properly obtaining permission from the user to get location data.
So, before we can get a location reading, we have to meet a two preconditions:
- the device has location enabled. The user can switch off “location services” or be in airplane mode. We cannot get a location reading if location services are disabled.
- the user must grant permission to access location data.
The
geolocatorpackage will help us check these preconditions, but we are going to need to show a message to the user if the preconditions are not met.
Make the following changes to _OnDemandScreenState:
- Add
String? erroras a class variable. This will hold the error message we want to display to the user. - Add the following after our “Get Location” ElevatedButton:
if (error != null)
  Text(
 error!,
 style: TextStyle(
     color: Colors.red[900],
     fontSize: 18,
     fontWeight: FontWeight.bold),
  ),
Now the build() method will display the
errorvariable as text whenerror != null.
We will obtain location permission and collect the reading from the geolocator in the same method. Both of those actions are asynchronous, so we need to create a custom async method. Add the following method inside the _OnDemandScreenState class:
  /// Determine the current position of the device.
  ///
  /// When the location services are not enabled or permissions
  /// are denied the `Future` will return an error.
  _determinePosition() async {
    error = null;

    // Test if location services are enabled.
    bool serviceEnabled = await Geolocator.isLocationServiceEnabled();
    if (!serviceEnabled) {
      // Location services are not enabled don't continue
      // accessing the position and request users of the
      // App to enable the location services.
      error = 'Location services are disabled.';
    }

    LocationPermission permission = await Geolocator.checkPermission();
    if (permission == LocationPermission.denied) {
      permission = await Geolocator.requestPermission();
      if (permission == LocationPermission.denied) {
        // Permissions are denied, next time you could try
        // requesting permissions again.
        //
        // Your App should show an explanatory UI now.
        error = 'Location permissions are denied';
      }
    }

    if (permission == LocationPermission.deniedForever) {
      // Permissions are denied forever, handle appropriately.
      error = 'Location permissions are permanently denied, we cannot request permissions.';
    }

    // Check that everything okay, then access the position of the device.
    if (error == null) {
      // This await blocks execution.
      Position pos = await Geolocator.getCurrentPosition();
      positions.add(pos);
    }

    // Trigger the rebuild.
    setState(() {});
  }
Finally, make the call _determinePosition(); inside the “Get Location” button’s onPressed property.
Have a look at the _determinePosition() method. The logical flow is this:
- The user presses the “Get Location” button.
- The method clears the
errormessage if it exists. - Check that location services are enabled. If not, set the error message.
- Check if the user has already granted permission.
- If not, ask for it. The
GeoLocator.requestPermission()call will launch a dialog box and collect the user response for you. Set the error message if the user denies it. - If the user has permanently denied location permission (this is an option on Android), set the error message.
- If you get to the bottom and
errorhas not been set, then all preconditions are met and we callGeolocator.getCurrentPosition()to read the latitude/longitude coordinate from the device. We append the resultingPositionto thepositionslist variable. - Finally, we call
setState()to trigger a rebuild and either show the error message or the new position in the list.
Here is what it looks like in action when the user grants permission:
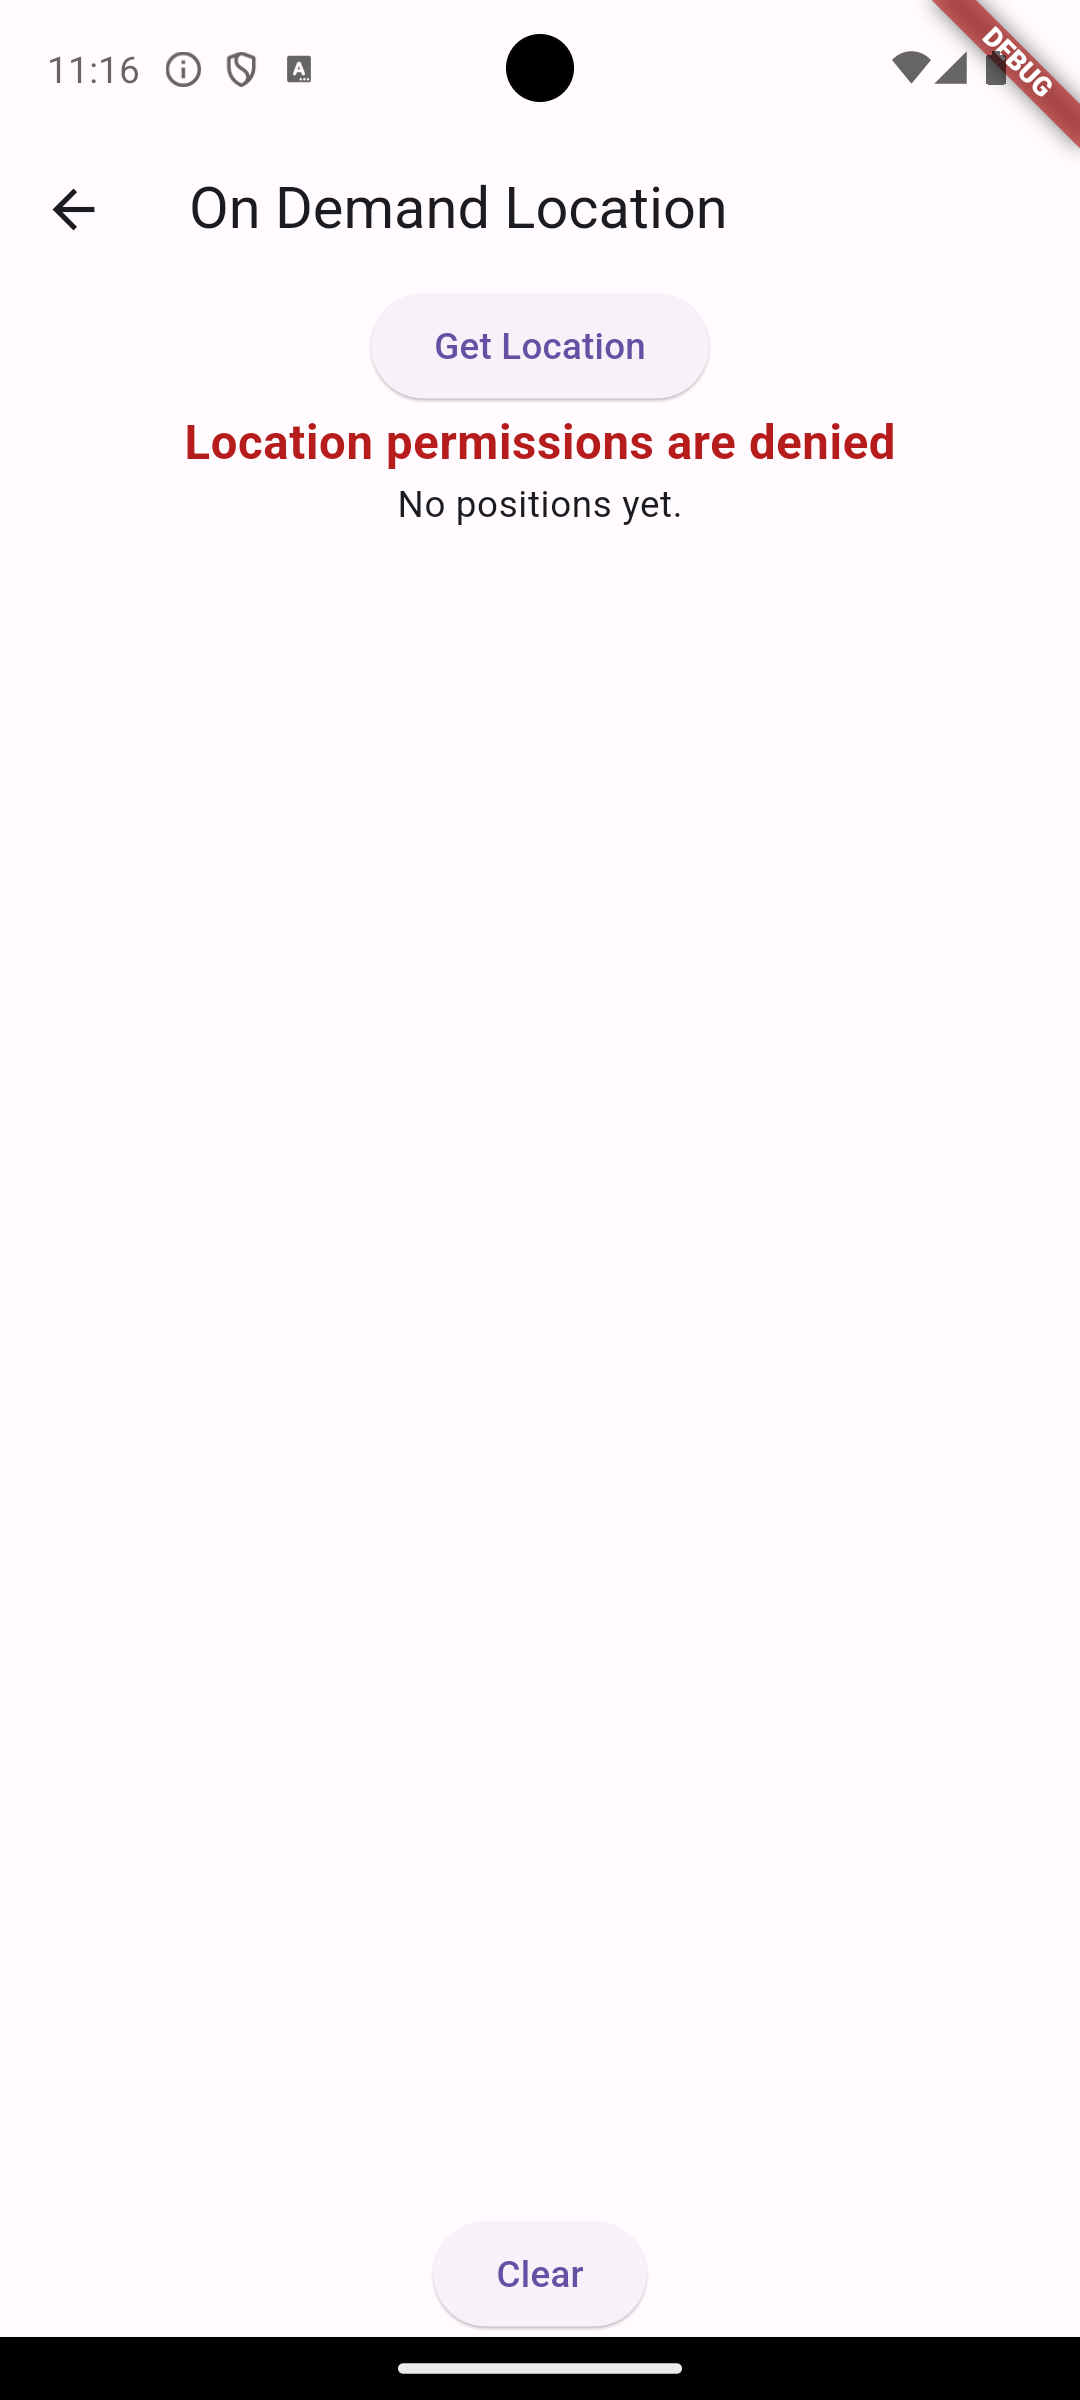
To demonstrate what happens when permission is denied, you can either uninstall the app from the device or go into the device Settings and revoke the location permission for the location_sampler app. Here is what denying permission looks like:
Playing with position
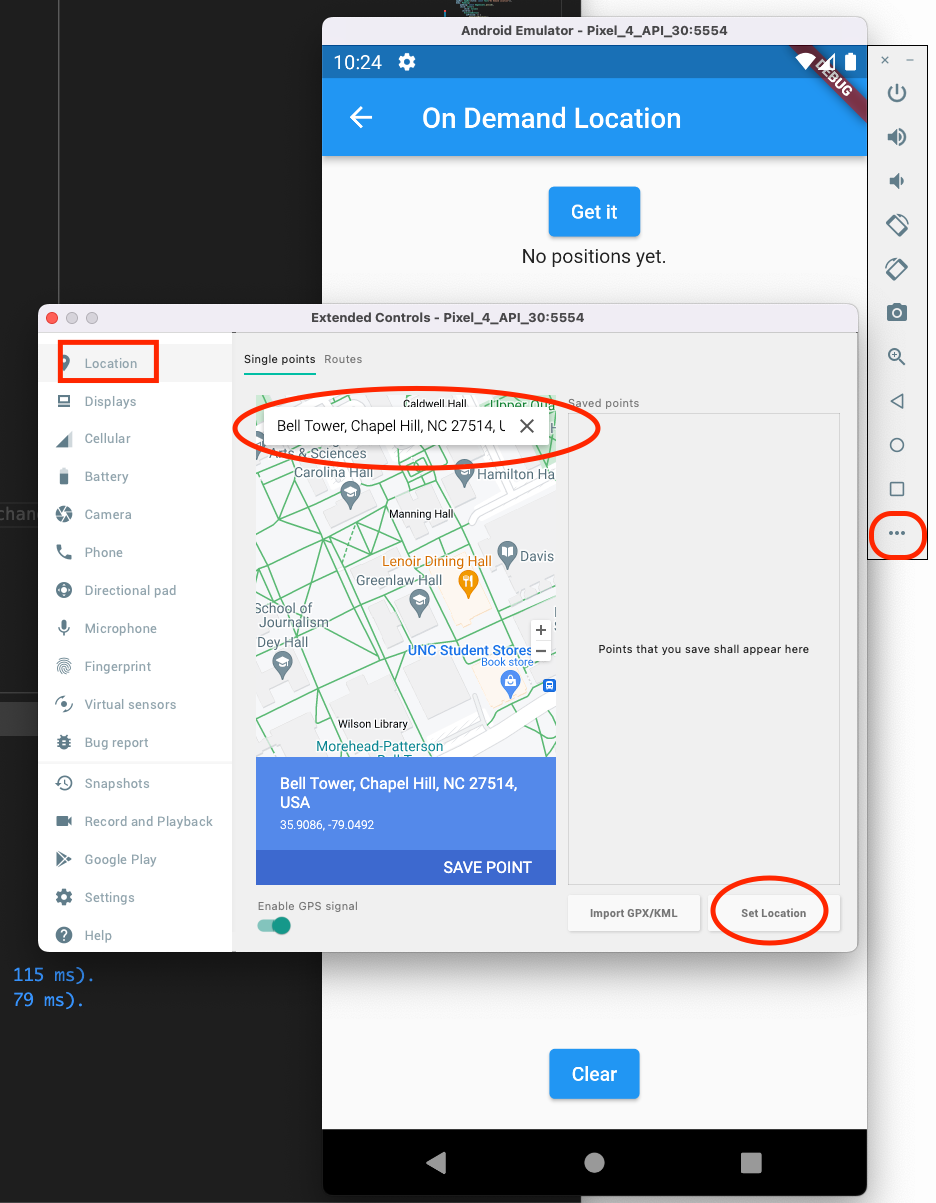
If you are using a real device, the location will update as you walk around. If you are using the Android Emulator or the iOS simulator, you can control which “fake” coordinates the device provides.
On the Android Emulator
- Click the three dots at the bottom of the emulator menu.
- Click “Location” on the left-side nav menu.
- Type in an address to search for or the latitude and longitude you want.
- Click the “Set Location” button.
The location provided to the emulator will now change.
On the iOS Simulator
- Go to the Features menu -> Location
- Select one of the preset options, or select Custom Location to enter your own coordinates.
Indicating progress
You probably observed a delay when pressing the “Get Location” button. Sometimes obtaining the location is nearly instantaneous because the native location libraries already have the coordinates on hand, and sometimes there is a several second delay as the GPS circuitry fires up.
We should indicate to the user that their button press of “Get Location” has triggered an action, and that action may take a moment to complete. A circular spinner or similar indicator of “processing” will do the trick.
We are effectively going to add a new state to our StatefulWidget:
- The state where we do not yet have position readings. (
positions.isEmpty) - The state where we have position readings. (
positions.isNotEmpty) - The state where an error occurred. (
error != null) - The state where we have requested a location reading and are awaiting the result. We will need another state variable to help distinguish between all these states.
First, add a new class variable to _OnDemandScreenState:
bool isProcessing = false;
Second, modify the build method so that the “Get Location” button only shows when isProcessing is false. If isProcessing is true, show a CircularProgressIndicator. Modify the “Get Location” button part of the Column to:
if (!isProcessing)
  ElevatedButton(
      onPressed: () => _determinePosition(),
      child: const Text("Get Location")),
if (isProcessing) const CircularProgressIndicator(),
Finally, we need to toggle the isProcessing state variable appropriately. We will do that in _determinePosition(). We want to set isProcessing to true just before we ask the Geolocator for the position, and then set it to false once that is completed. Modify the if(error == null) { block of _determinePosition() as follows:
    // Check that everything okay, then access the position of the device.
    if (error == null) {
      // Trigger a rebuild to indicate the location is processing.
      setState(() => isProcessing = true);
      // This await blocks execution.
      Position pos = await Geolocator.getCurrentPosition();
      positions.add(pos);
      isProcessing = false;
    }
The final result should look like this:
Conclusion
The exact mechanisms for determining location depend on your device. Android, iOS, web, and desktop are all different. The GeoLocator library provides a simple interface to getting location in Flutter, and also handles asking the user for permission to access their location.
In the next lab, we will demonstrate how to stream location information constantly and react to changes in position.