Getting started with Visual Studio Code
- Prerequisites
- Class video
- Creating a new Flutter project in Visual Studio Code
- Project Structure and Navigation
- Selecting a device
- Running a Flutter project
- Skills to take away
- Extra Info
- Up Next
This lab will get you started with creating and running Flutter projects in Visual Studio Code.
Prerequisites
Complete Environment Setup and either Windows Setup or Mac Setup first.
Class video
This video covers this lab and the next lab on Intro to Flutter and Dart.
Creating a new Flutter project in Visual Studio Code
- Open Visual Studio Code
- Get used to the hotkey for opening the VS Code command palette -
Ctrl+Shift+PorCMD+Shift+P - Open the Command Palette and type “flutter” to get the available Flutter commands. Select
Flutter: New Projectthen pickApplication. - A file browser will pop up. Navigate to and select your
%HOME%/flutter_projectsdirectory. - You will be prompted to name the project. Name it something like
my_first_flutter_project. - Visual Studio Code will then automatically invoke the Flutter SDK to initialize a new project. You can find the project in the
%HOME%/flutter_projects/my_first_flutter_project- You can make as many Flutter projects as you want. It doesn’t really matter where you put them either. But do NOT put one flutter project inside another flutter project’s directory – that will give you trouble.
- VS Code will automatically open the Flutter project in a new window. You should see some code in the
main.dartfile.
Keyboard shortcuts - the way of the Master
Everything you can do with a menu and a mouse has a keyboard shortcut. Menu+mouse is easier to learn, but keyboard shortcuts will make you about 30% more productive once you master them.
Rule of thumb: If you use the same mouse+menu commands over and over, learn the keyboard shortcut instead. Try to learn a shortcut or two each week.
I’ve highlighted my most-used keyboard shortcuts in the official cheatsheets from Visual Studio Code:
Project Structure and Navigation
Flutter projects are contained in the project folder, e.g., my_first_flutter_project/, on your hard drive. Visual Studio Code provides the “Explorer” view (top-most icon in the left pane) for navigating the project structure. You can easily create new files and folders and move them around with this view.
Here are the most critical things to know about the project structure at this point:
lib/- this subdirectory will house your.dartsource code files for your app. Thelib/main.dartis the starting point for any Flutter app and houses themain()method.pubspec.yaml- this is the configuration file for Flutter projects. We will be working in it, but do not modify it for now.- Ignore other files and folders for now. Flutter needs them to compile and run properly. The ios, android, linux, macos, web, and windows folders contain native platform-specific items.
Selecting a device
Flutter is capable of making of iOS, Android, web, and desktop apps. Before you run a Flutter project, you must select which device you want to launch Flutter on.
You may have created a virtual device in the course of completing the Windows or Mac Setup labs. The virtual device is either a simulated Android phone using the Android Emulator or a simulated iOS phone using the Simulator app. You can also use a real Android or iPhone.
Flutter treats virtual devices and real devices the same way. You pick which specific device you want to test Flutter on. You can also switch between devices at any time, which is great for testing on multiple phones.
- In Visual Studio Code, there are two ways to select the device on which to run your Flutter app:
- Open the Visual Studio Code Commande Palette and search for
Flutter: Select Device. Select it, and you should see a drop-down list of virtual and real devices. - In the Visual Studio Code status bar on the bottom-right, you should see
Flutter: 3.13.0. Immediately to the right of that is the device selector, which may sayNo DeviceormacOSorChromedepending on your setup. Click on this item, and you should receive a drop-down list of virutal and real devices.
- Open the Visual Studio Code Commande Palette and search for
- Select a virtual device or real phone to test on. If you select a virtual device, Visual Studio Code will attempt to launch it on your desktop. The bottom right toolbar of Visual Studio Code should have the name of your running device:
 . When you run the Flutter project in the future, it will use the device shown in the toolbar.
 - If you had trouble setting up a real or virtual phone, pick a web browser as your device for now.
Running a Flutter project
To run a Flutter project, first ensure that you have selected a device as described in the previous section.
You generally want to run your Flutter app “in debug mode”. This will give you access to additional tools for troubleshooting your code at the expense of being a little slower to compile.
- Find
lib/main.dartin the Explorer pane and left-click to open it. - Select the
Runmenu at the top, thenStart Debugging. The keyboard shortcut to run is F5. If prompted to select a debugger, choose the ‘Dart and Flutter’ option. - Generally, you want to
Runfromlib/main.dart - Flutter will build and run your application on your selected device. The first run may take a long time to start, but should be faster after that.
- Pull up your virtual device’s window or look on your real device. You should see “Flutter Demo Home Page” along with some text and a floating “+” button. Feel free to interact with the app.
- In Visual Studio Code, you should see a pop-up with the “run controls”:

- The red square is the Stop button. It will terminate the Flutter application on your device.
- The green circular arrow is the Reload button. You can press this when changes aren’t showing up from the “Hot Reload”
- You can move the Run Controls by dragging the dotted columns on the left edge.
Hot Reload
Flutter has a hot reload feature. For certain code changes, Flutter can replace the running code without needing for you to use Run->Start Debugging or hitting F5. This can be a big time saver.
If you make a change to your app, but you don’t see it in the emulator, simply re-build and re-run the application using Run->Start or hitting F5.
Try the following:
- Find
lib/main.dartin the Explorer pane and left-click to open it. - Run the Flutter application, and make sure it is showing on your device.
- Select the editor window for
main.dart. Hit Control-F or Command-F to search for text. Search for the text “pushed”. - Change the word “pushed” to “pressed”.
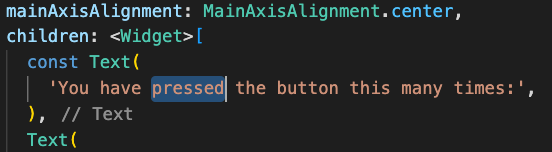
- Hit Control-S or Command-S to save your changes to the file.
- If your device and Flutter are running, Flutter should have “hot reloaded” your change onto the device. Does the device now show “You have pressed the button this many times”? Run the app again if you don’t see the change.
- Generally, hot reload will work. Visual Studio Code gives you a warning and tells you to re-run the app if hot reload doesn’t work.
Skills to take away
- Open the Visual Studio Code Command Palette with a key combo
- Quickly create a New flutter project
- Selecting a real or virtual device to launch
- Running the Flutter app from Visual Studio Code
Extra Info
Visual Studio Code vs. Android Studio
Visual Studio Code (Visual Studio Code or just Code) is a free Integrated Development Environment (IDE) published by Microsoft. It has many different “Extensions” to support many different programming languages, including Flutter. The “official” IDE for Flutter is Android Studio published by Google/Android. You are free to use Android Studio if you wish. I use Visual Studio Code in this course because it works well with Flutter and is lightweight, whereas Android Studio can be quite the memory hog. Running Android Studio + native build tools + emulator/simulator to compile and run a Flutter app can be a strain on your computer’s resources.
Up Next
You are ready to move on to the Introduction to Flutter and Dart lab.