Cloud Firestore - Introduction
- Objectives
- Prerequisites
- Introduction
- Add Firestore to your project through the Firebase console
- Adding data through the web console
- Next
Objectives
- To understand the general capabilities of the Cloud Firestore
- To enable the Cloud Firestore for an app project
- To view and add data through the Firestore web console
- To write Flutter code that adds data to the Firestore programmatically
Prerequisites
You must complete the following prior to this lab:
Introduction
Firebase’s Cloud Firestore is a NoSQL cloud database. It lives inside the Firebase project console, just like Firebase Authentication does. Firestore is ideal for creating and sharing data used by thousands or millions of your app’s users at once.
Databases are software systems that specialize in storing and searching data. The data are typically the “primitive” types: strings, numbers, booleans, bytes, and the like. Many databases are capable of storing more complicated data, like lists, images, geopoints, and more.
If you are familiar with databases from school, most likely you have experience with relational or SQL databases, like MySQL or Postgres. Cloud Firestore is a NoSQL database. It does not have relational database concepts like foreign keys, tables, or JOINs.
The best way to think of the Cloud Firestore is that it stores documents. Think of documents as analogous to a Dictionary in Python, a Map in Java, or JSON objects. Documents are a collection of key-value pairs that represent some entity in your system, e.g., a Person, a Site, a TinderMatch, or a JournalEntry.
So what can you do with the Firestore? Like any database, it excels at the CRUD operations: create, read, update, and delete data.
Let’s start by setting up the Cloud Firestore for a project, and then we will explain more how it stores data.
Add Firestore to your project through the Firebase console
First, we need to enable the Firestore for your project. Go to https://console.firebase.google.com, select your project, and do the following:
-
Select Build from the left menu -> Firestore Database
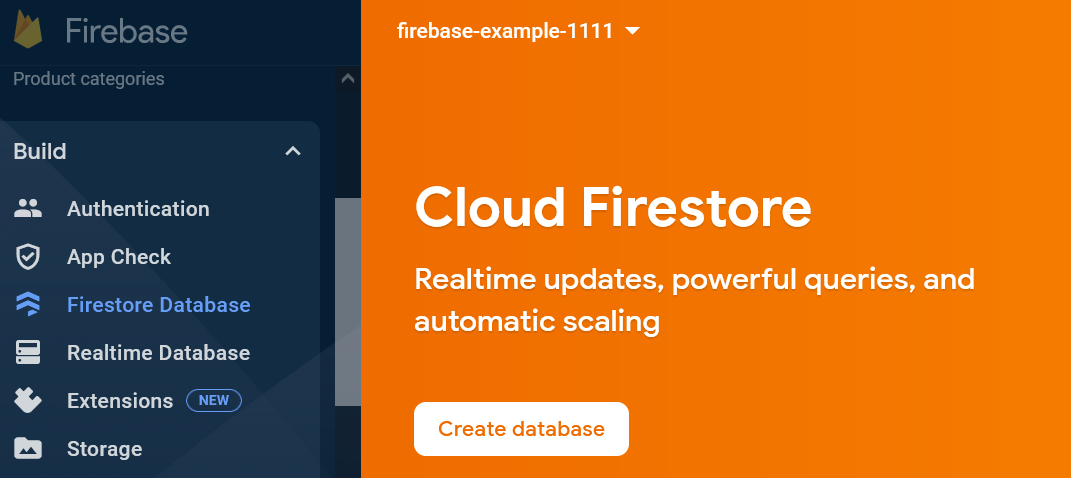
- Click ‘Create Database’
- Select ‘Start in production mode’. This will keep your data secure. You can select ‘Start in test mode’ if you are very early in your app development and do not have a notion of users or logins.
- Select a Cloud Firestore location. Pick something geographically close to you.
-
Finally, click Enable. Your Firestore database will take a moment to be created, then you will see a screen like this:
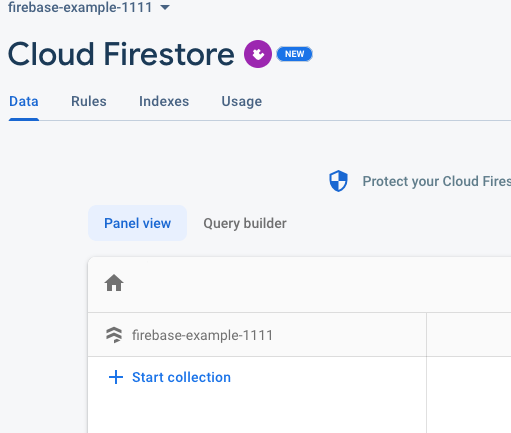
We now have an empty database ready to use.
Adding data through the web console
We can add data either through the web console, or programmatically from an app. We’re going to add some simple starter data through the web console.
The Firestore organizes data into collections. We need at least one collection in which to store data. Collections should be named the thing they represent. We’re going to create a People collection.
When we create our collection, we must also create our first document. A document is the basic unit of the Firestore. Documents store key-value pairs, much like a Python Dictionary or a Java Map. The key is a string and is the variable name, and the value is a primitive value like a number, a string, a boolean, or a datetime. Our People collection will have multiple documents representing individual persons.
Each document must have a unique id. In database terms, this is the “primary key”. This unique identifier is used in searching and other functions. You can specify your own key, or let Firestore generate one for you. It doesn’t matter which you choose. But, if you specify your own key, it must be unique within the collection.
- Click “+ Start collection”.
- In the pop-up, enter
Peoplein the Collection ID box. Click Next.- Very Important Note: Firestore is case-sensitive, so
People!=people.
- Very Important Note: Firestore is case-sensitive, so
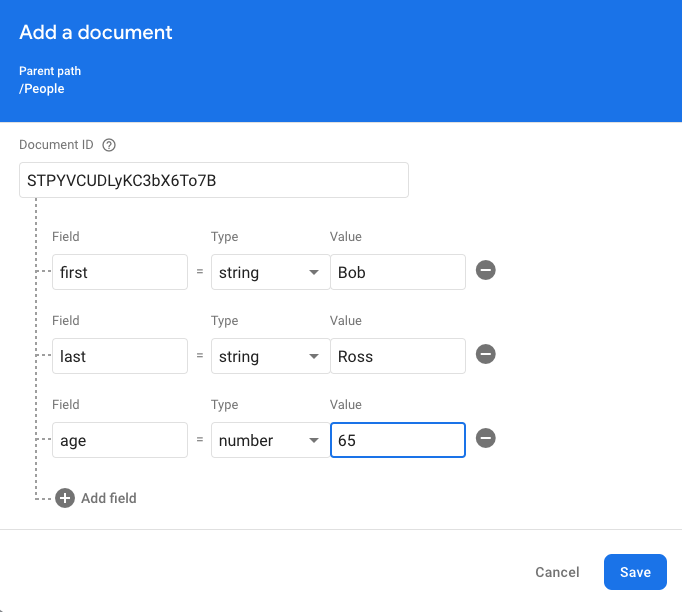
- The subsequent pop-up prompts you to create a document.
- Click the “Auto-ID” text label to generate an automatic id.
- Set the Field to “first”, Type to “string”, and Value to “Bob”
- Click the + symbol to add a second field. Set Field to “last”, Type to “string”, and Value to “Ross”
- Click the + symbol to add third field. Set Field to “age”, Type to “number”, and Value to “65”
- Click Save
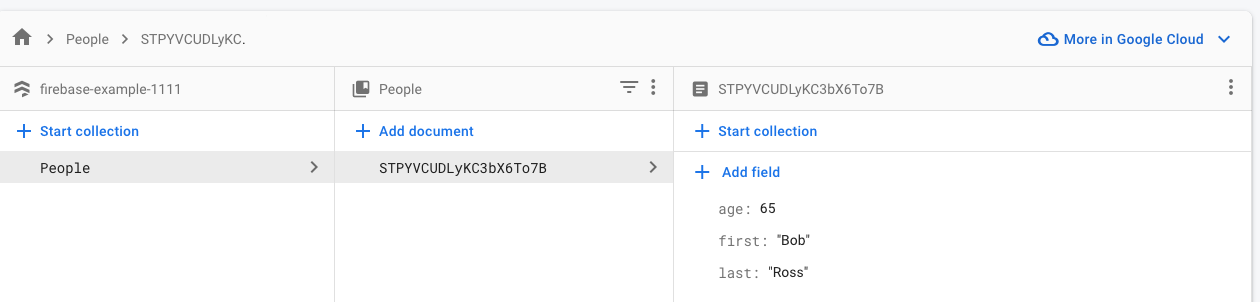
After you click Save, you should see the new Collection and Document appear in the screen. Try adding another Document by clicking “+ Add document” in the center pane.
You may have noticed several options in the Type dropdown. These are the data types Firestore supports. They are fairly limited, and you cannot store things like images.
Documents in a collection do not need to have the same fields. Every document can be different. But, from an app development perspective, it will be beneficial for each Document in a collection to have the same fields names and types.
Next
Now we are ready to write data to the Firestore in the next lab Cloud Firestore - Creating Data from Your App!