Google Maps
- Objectives
- Introduction
- Boilerplate
- Obtain a Google Maps API key
- Enabling Google Maps libraries in our app
- Adding a simple map
- Moving the camera
- Adding markers
- Other functionality
Objectives
- to add a Google Map to an application
- to demonstrate how to shift map camera position
- to add interactive markers to the map
Introduction
App developers have several mapping options, including Google Maps, Apple Maps, and Mapbox. These mapping services provide native (iOS and Android) libraries to display maps, drop pins, add annotations, and more.
Displaying a map and adding your own custom annotations to it is usually free or inexpensive below a certain request threshold. However, searching for places by name, navigation, and location cost money.
We will be using Google Maps because the Flutter team provides an official, supported Google Map library. We will create a simple map and drop some pins on it that the user can tap on for more information.
We will be working from the location_sampler app from the Location on Demand lab.
Boilerplate
Create a new file named map_screen.dart and add the following boilerplate code:
import 'package:flutter/material.dart';

class MapScreen extends StatefulWidget {
  const MapScreen({super.key});

  @override
  State<MapScreen> createState() => _MapScreenState();
}

class _MapScreenState extends State<MapScreen> {
  @override
  Widget build(BuildContext context) {
    return Scaffold(
        appBar: AppBar(title: const Text("Map Screen")),
        body: const Placeholder());
  }
}
On main.dart
- Add
import 'package:location_sampler/map_screen.dart';to the top. - Add a button to navigate to this new screen:
ElevatedButton(
 onPressed: () {
 Navigator.push(
     context,
     MaterialPageRoute(
         builder: (context) => const MapScreen()));
 },
 child: const ListTile(
     leading: Icon(Icons.maps_home_work_rounded),
     title: Text("Show Map"),
     subtitle: Text("Show a Google Map with pins")))
Obtain a Google Maps API key
Google Maps is a paid service. The way Google Maps tracks usage against your account is by providing you with a unique API key. You must keep this key private. You get $200 of free credits from Google, which we will not come close to using. The Google Cloud platform, where Maps lives, is separate from Firebase.
- Go to https://mapsplatform.google.com/ and click “Get Started”
- You may be prompted to set up a billing account – do this if necessary.
- The Google Cloud platform may ask you to choose a project. Either choose an existing CSC 315 project, or create a New Project. I called mine “315-samples”
- Your API Key will pop-up. Copy this API key to a text file. Leave the other options checked. Click “Go to Google Maps Platform”.
- If you lose the key, you can view it from the “Keys & Credentials” page in the left menu.
- A pop-up suggesting that you “Protect Your API Key” key will display. This is a good idea for production apps, but for this test app, we are not going to do it. Click “Maybe Later.”
- You should now see the Google Maps console. Click on “APIs” on the left menu. Ensure that “Maps SDK for Android” and “Maps SDK for iOS” show as Enabled.
Enabling Google Maps libraries in our app
Now we need to add the Google Maps library to our Flutter project. We also need to tell Android and iOS what our API key is for Google Maps by adding some native code.
- Open
pubspec.yamland addgoogle_maps_flutter: ^2.12.1to thedependenciessection. - If using Android, follow the steps here.
- If using iOS, follow the steps here for modifying
ios/Runner/AppDelegate.swift. You are adding theimport GoogleMapsstatement at the top and theGMSServices.provideAPIKey("YOUR KEY HERE").
Important security note
We have created a security risk. Anyone who sees our API key can use our Google Maps and run up our bill. This API key must be kept secret.
So, make sure that if you are using a GitHub repository to store your work, make sure the repository is set to Private, otherwise the whole world will see your API key.
Remember that “Protect Your API Key” pop-up that we ignored? If we had done that, this wouldn’t be an issue, because only your app would be allowed to the Maps services attached to your billing account. Adding this restriction requires many steps.
So the bottom line is, keep your repository private until you are ready to publish, then come back and restrict your API key.
Adding a simple map
We are now ready to add a simple map.
At the top of map_screen.dart: add the following imports:
import 'dart:async';
import 'dart:math';
import 'package:google_maps_flutter/google_maps_flutter.dart';
Change _MapScreenState to the following:
class _MapScreenState extends State<MapScreen> {
  GoogleMapController? _controller;

  static const CameraPosition _uncwBellTower = CameraPosition(
    target: LatLng(34.2271592, -77.8729786),
    zoom: 15,
  );

  @override
  Widget build(BuildContext context) {
    return Scaffold(
      appBar: AppBar(title: const Text("Map Screen")),
      body: GoogleMap(
        mapType: MapType.hybrid,
        initialCameraPosition: _uncwBellTower,
        onMapCreated: (GoogleMapController controller) =>
            _controller = controller,
      ),
    );
  }
}
Run the app, select the Map Screen button, and you should see the following:
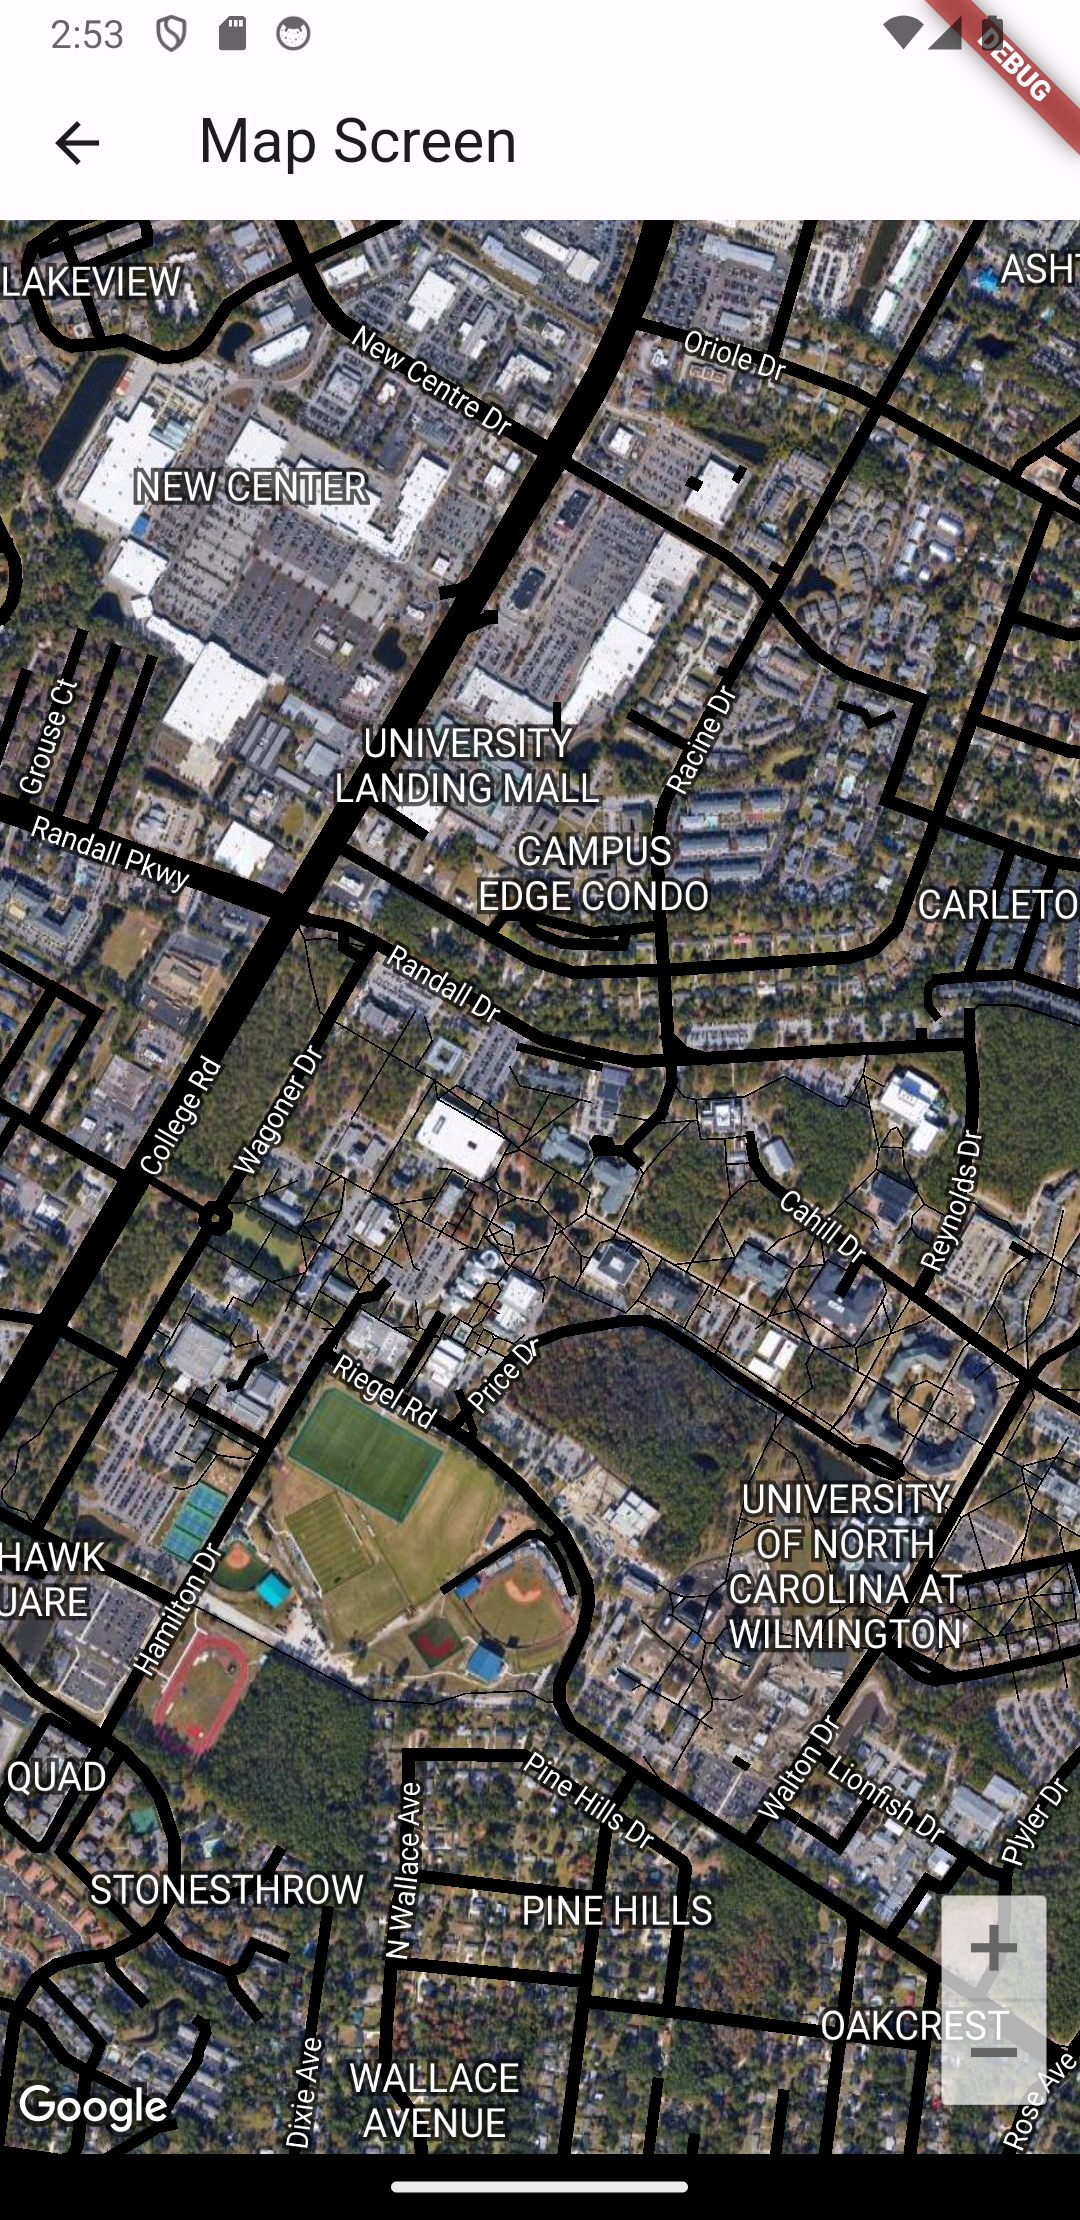
Let’s examine a few things:
The GoogleMap widget is what draws the map on the screen.
- The
mapTypeproperty can be changed to switch between satellite view, “normal” navigator view, hybrid, and more. - The
initialCameraPositionproperty takes aCameraPositionobject that sets the starting location of the map. - The
onMapCreatedproperty provides a controller for the Google Map widget that we can use to issue commands to the Map (like change your camera position). - There are a few other configuration properties for the GoogleMap widget you can explore.
GoogleMaps work with CameraPosition objects that position and elevate a virtual camera over the world map.
- The
targetis latitude and longitude coordinates over which to center the camera. - The
zoomis a proxy for camera elevation. Azoomof 0 is zoomed all the way out, and azoomof 23 is all the way in, and you can specify whole integers in between. - The CameraPosition also has a
bearingproperty, which is the direction the camera is facing in degrees clockwise from north. - The CameraPosition can have a
tiltproperty, which is the the camera angle from the nadir (directly facing the Earth).
Right now, you have a simple map that you can pan by dragging and zoom by pinching.
Moving the camera
You can move the camera programmatically as well. This is useful for panning to a selected site. We’ll add a FloatingActionButton that moves the camera to a random site on the globe.
Change your _MapScreenState to the following:
class _MapScreenState extends State<MapScreen> {
  GoogleMapController? _controller;

  static const CameraPosition _uncwBellTower = CameraPosition(
    target: LatLng(34.2271592, -77.8729786),
    zoom: 15,
  );

  @override
  Widget build(BuildContext context) {
    return Scaffold(
      appBar: AppBar(title: const Text("Map Screen")),
      body: GoogleMap(
        mapType: MapType.hybrid,
        initialCameraPosition: _uncwBellTower,
        onMapCreated: (GoogleMapController controller) => _controller = controller,
      ),
      floatingActionButton: FloatingActionButton.extended(
        onPressed: _goWander,
        label: const Text('Wander!'),
        icon: const Icon(Icons.hiking),
      ),
      floatingActionButtonLocation: FloatingActionButtonLocation.centerFloat,
    );
  }

  _goWander() {
    Random random = Random();
    double randomLatitude = random.nextDouble() * 180 - 90;
    double randomLongitude = random.nextDouble() * 360 - 180;
    print("Going to $randomLongitude, $randomLongitude");

    CameraPosition destination = CameraPosition(
        bearing: random.nextDouble() * 360,
        target: LatLng(randomLatitude, randomLongitude),
        tilt: 79.5,
        zoom: 5);

    _controller?.animateCamera(CameraUpdate.newCameraPosition(destination));
  }
}
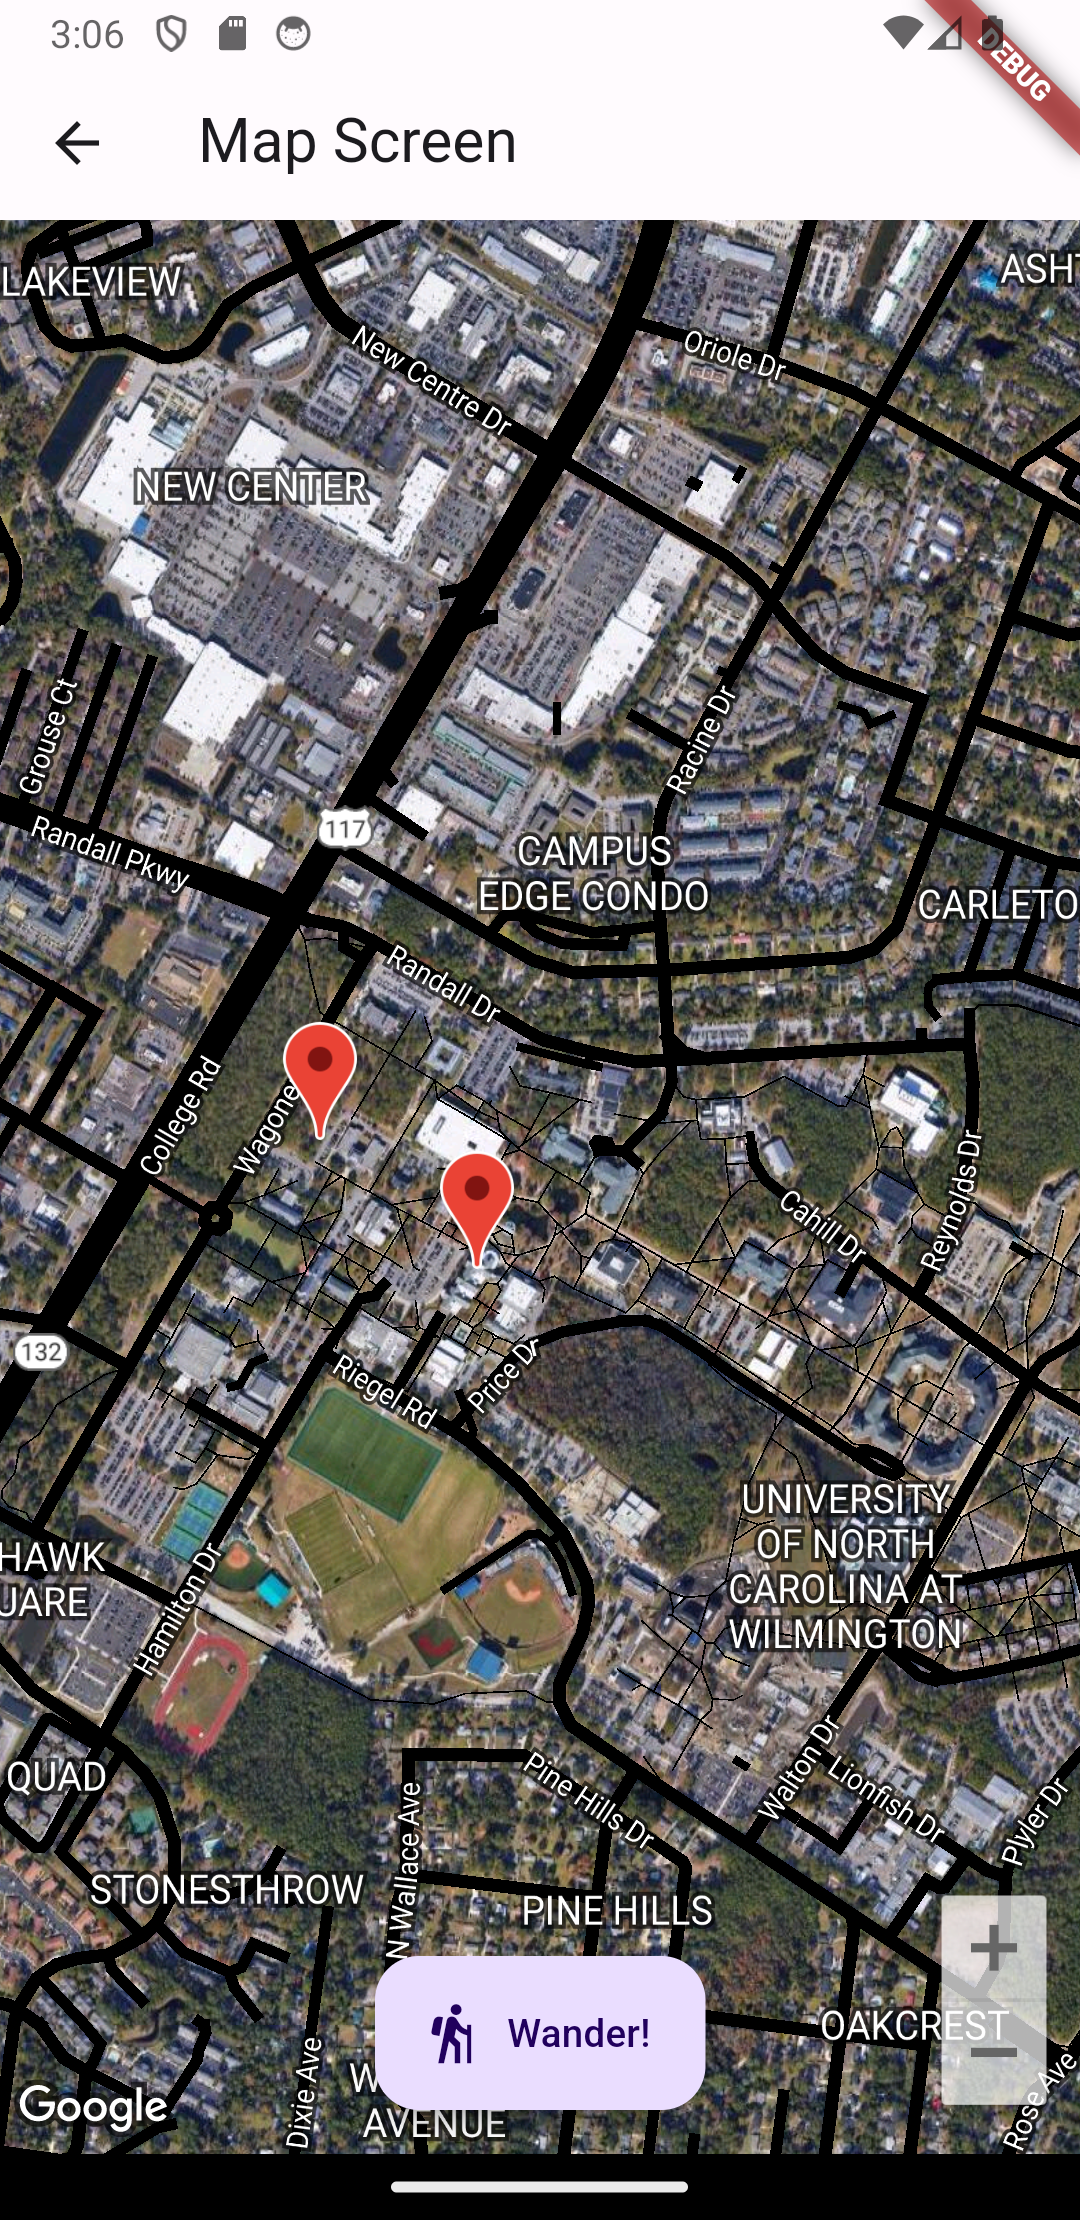
You now have a “Wander” floating action button in the center of the screen. Clicking it invokes the _goWander method, which generates random latitude and longitude coordinates and uses the GoogleMap widget’s _controller to animate the camera to the new location.
The animateCamera call provides a smooth animation from point A to point B. If you don’t want to animate, call moveCamera instead to immediately reposition the camera.
The intermediate “blank” grey screens that you see is due to how Google Maps (and other mapping software) load data. The map is actually a set of hi-res images called “tiles”. Tiles are how mapping software break up the world. Tiling and stitching together tiles to deliver optimum performance with minimal data transmission is a complicated process. Google Maps doesn’t download all tiles for the world – only what it knows you want to see and what it thinking you might want to see next (e.g., when navigating).
Adding markers
The last thing we will do is add interactive markers to our map. The markers provide a visual cue of a point of interest, and the user can interact with markers by tapping. Markers can also be dragged around the map, though we do not illustrate that here.
First, we define a set of Marker objects, each with a unique MarkerId and coordinates on the map. We will place the markers in a Dart “map” (dictionary) object so that we can look them up by id later if needed. Add the following class variable to _MapScreenState:
Map<MarkerId, Marker> markers = <MarkerId, Marker>{};
This initializes an empty dictionary (map) where the keys are MarkerIds and the values are Markers.
Second, we need to set up some markers. We will do that in our State class’ initState() method. We are hardcoding some values in the example below, but hopefully you can imagine how we could create markers based on a list of data or a remote data source such as the Firestore.
Paste the following code into the _MapScreenState class:
@override
void initState() {
  super.initState();

  // Create some markers.
  // Markers in Google Maps must have unique identifiers.
  MarkerId congdonMarkerId = const MarkerId("Congdon Hall");
  final Marker congdonHallMarker = Marker(
    markerId: congdonMarkerId,
    position: const LatLng(34.2261004, -77.873966),
  );
  markers[congdonMarkerId] = congdonHallMarker;

  MarkerId randallMarkerId = const MarkerId("Randall Library");
  final Marker randallMarker = Marker(
    markerId: randallMarkerId,
    position: const LatLng(34.227766, -77.876411),
  );
  markers[randallMarkerId] = randallMarker;
}
Finally, change the GoogleMap() widget to load the markers:
      body: GoogleMap(
        mapType: MapType.hybrid,
        initialCameraPosition: _uncwBellTower,
        onMapCreated: (GoogleMapController controller) => _controller = controller,
        markers: Set<Marker>.of(markers.values),
      ),
You should now see two red markers on the map. You should see they correspond to Randall Library and Congdon Hall when you zoom in.
Adding info windows
Basic markers are not interactive. We can easily add pop-ups that show when a user taps a marker. These are called InfoWindows in Google Maps.
We will set the title of the InfoWindows to be the MarkerId, and this text will be shown when the user taps. You can optionally add a snippet property that provides additional subtext.
Change the Marker declarations in initState like so:
final Marker congdonHallMarker = Marker(
  markerId: congdonMarkerId,
  infoWindow: InfoWindow(
    title: congdonMarkerId.value,
  ),
  position: const LatLng(34.2261004, -77.873966),
);
and
final Marker randallMarker = Marker(
  markerId: randallMarkerId,
  infoWindow: InfoWindow(
    title: randallMarkerId.value,
    snippet: "Study here!",
  ),
  position: const LatLng(34.227766, -77.876411),
);
Now, you should see a helpful text pop-up when you tap on a marker:

Finally, InfoWindows have an onTap property that will fire when the user taps on the text pop-up. This is ideal when, for example, you want to take the user to another part of your app that provides additional information or functionality for the marked site. For example, add the following onTap property inside the InfoWindow for the randallMarker:
        onTap: () {
          SnackBar snackBar = const SnackBar(
              content: Text("Randall Library is a great place to study!"));
          ScaffoldMessenger.of(context).showSnackBar(snackBar);
        },
Add something similar to the InfoWindow for the congdonHallMarker. You can put whatever code inside the onTap you like.
Other functionality
Google Maps has much more functionality than what we have demonstrated here, including:
- Responding to arbitrary taps on the map
- Responding to gestures for panning, zooming, and tilting the camera
- drawing circles, lines, and polygons on the map
- adding custom marker icons
The official documentation and, more importantly, the example code have more information on using these other features.