Cloud Storage - Taking and Saving Photos to the Cloud
- Objectives
- Class recording
- Prerequisites
- Setup
- Introduction
- Firebase and Flutter setup
- Important Note - May not work for web
- Accessing the Camera and Photo Gallery
- Saving and loading a profile image from Cloud Storage
- Setting the profile image when ProfileScreen is loaded
- Conclusion
- Completed code
- Other resources
Objectives
- To introduce you to a simple library for selecting pictures from the gallery or taking photos using the camera.
- To set up Firebase Cloud Storage for storing and sharing of files in the cloud for use in your app.
Class recording
Prerequisites
- Make sure you are using the latest version of Flutter by running
flutter upgradein the Terminal. - You must complete Cloud Firestore - Reading, Updating, and Deleting Data prior to this lab.
Setup
- Download main.dart and replace the one in
lib/ - Download cloud_storage.dart to your
lib/folder.
Introduction
The Cloud Firestore provides us with a mechanism for sharing basic data: strings, numbers, dates, and even lists. But, it is not suitable for sharing other types of data like images, audio, or video. Images, for example, can be large and are usually not searchable (though you may want to search their metadata like name, location taken, filetype, etc.). Rather than use a database, like the Firestore, we will store these data in a giant file directory in the cloud, sort of like a OneDrive or Google Drive for your app.
Firebase Cloud Storage will be our shared file storage in the cloud. It costs around $0.02/GB per month to store files and you are charged $0.01/GB per month to download files. These prices are negligible for small apps with few users in development.
Your Firebase project can have one storage “bucket”, which is the root of the file storage. Within that root directory, you can have subdirectories. The following excerpt from the Cloud Storage documentation summarize the service:
Your files are stored in a Cloud Storage bucket. The files in this bucket are presented in a hierarchical structure, just like the file system on your local hard disk, or the data in the Firebase Realtime Database. By creating a reference to a file, your app gains access to it. These references can then be used to upload or download data, get or update metadata or delete the file. A reference can either point to a specific file or to a higher level node in the hierarchy.
We are going to add Cloud Storage to our Firebase example application and use it to store user profile images. We will also introducing a handy Flutter library for getting a picture from the device’s camera or photo gallery.
Firebase and Flutter setup
We first need to enable Cloud Storage for any Firebase project that we use. We will also add a few new Flutter dependencies to our project to help us interact with Cloud Storage and the camera/gallery picker.
Adding Cloud Storage to a Firebase app
- Open the Firebase console for your example application. Add Storage to from the Build menu on the side.
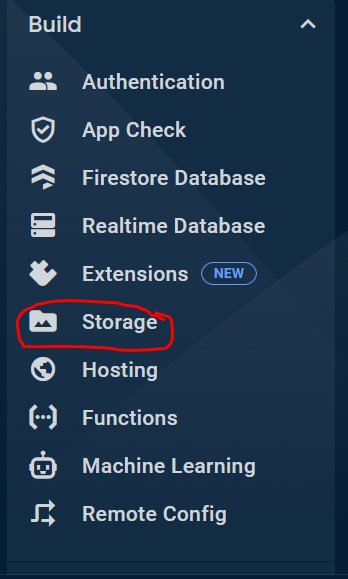 .
. - Click the “Get Started” button.
- Click “Start in Production mode”
- Select the “Rules” tab, then “Edit rules”, then change the text to the following and “Publish”
rules_version = '2';
service firebase.storage {
   match /b/{bucket}/o {
     match /{allPaths=**} {
       allow read, write: if request.auth.uid != null;
     }
   }
 }
This makes it so that users need to be authenticated in our app to write to and from storage.
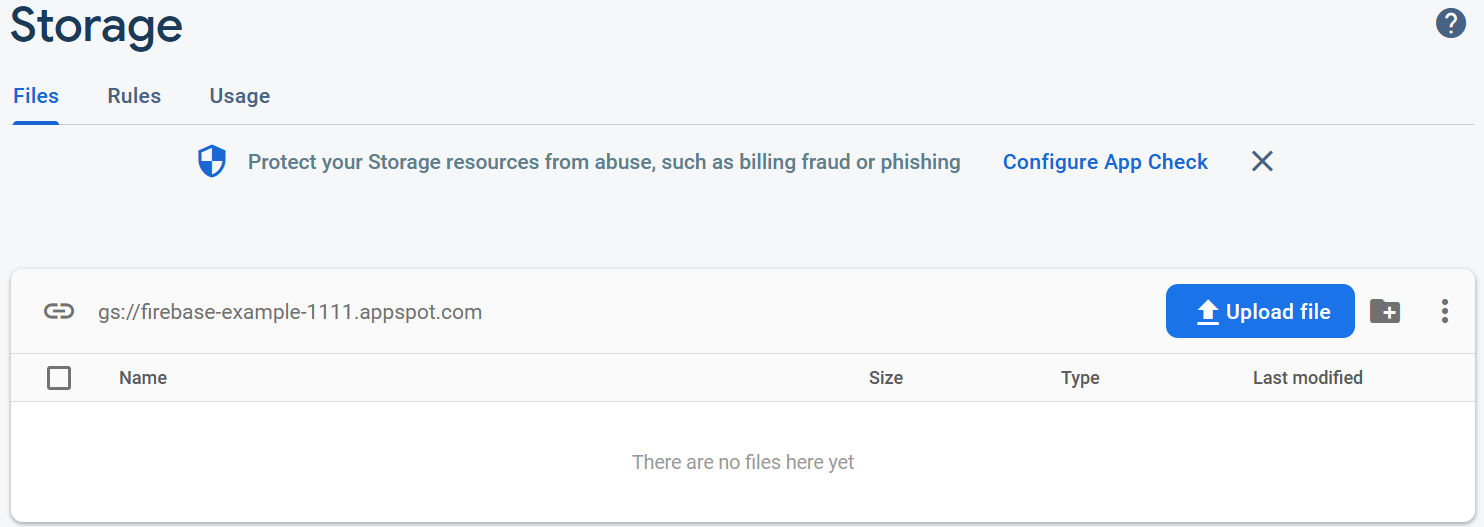
The Storage console shows the root of the “bucket”. You can create subdirectories to help organize content. Like with the Firestore, any files that we add will appear here in realtime. You can manually upload files if you want. For now, we will leave this as-is.
 .
.
Flutter project setup
We will continue using the Firebase Example Project from the preceding labs.
First, we are going to add and update a few libraries in our project. Open pubspec.yaml and add the following two libraries under the dependencies section::
dependencies:
  firebase_storage: ^11.7.0
  image_picker: ^1.0.7
VSCode should automatically download the libraries. But, open the Command Palette (View -> Command Palette) and run the command “Pub: Get Packages”.
Create a new file in your project’s lib/ directory called cloud_storage.dart and paste in the following:
import 'dart:io';

import 'package:firebase_auth/firebase_auth.dart';
import 'package:firebase_storage/firebase_storage.dart';
import 'package:flutter/material.dart';
import 'package:image_picker/image_picker.dart';

class ProfileScreen extends StatefulWidget {
  const ProfileScreen({super.key});

  @override
  State<ProfileScreen> createState() => _ProfileScreenState();
}

class _ProfileScreenState extends State<ProfileScreen> {
  // State variable that will refer to the profile image location.
  String? imageFile;

  @override
  Widget build(BuildContext context) {
    return Scaffold(
      appBar: AppBar(title: const Text("Profile")),
      body: Column(
        children: [
          if (imageFile == null) const Icon(Icons.account_circle, size: 72),
          if (imageFile != null) const Placeholder(),
          Row(
            mainAxisAlignment: MainAxisAlignment.spaceEvenly,
            children: [
              ElevatedButton(onPressed: () {}, child: const Text("Camera")),
              ElevatedButton(onPressed: () {}, child: const Text("Gallery")),
            ],
          )
        ],
      ),
    );
  }
}
Add the following OutlinedButton to the others in the HomeScreen in main.dart:
OutlinedButton(
  onPressed: () => Navigator.push(
      context,
      MaterialPageRoute(
        builder: (context) => const ProfileScreen(),
      ),
    ),
  child: const Text("Cloud Storage")),
Run your app and click the Cloud Storage button, and you should see something like this:
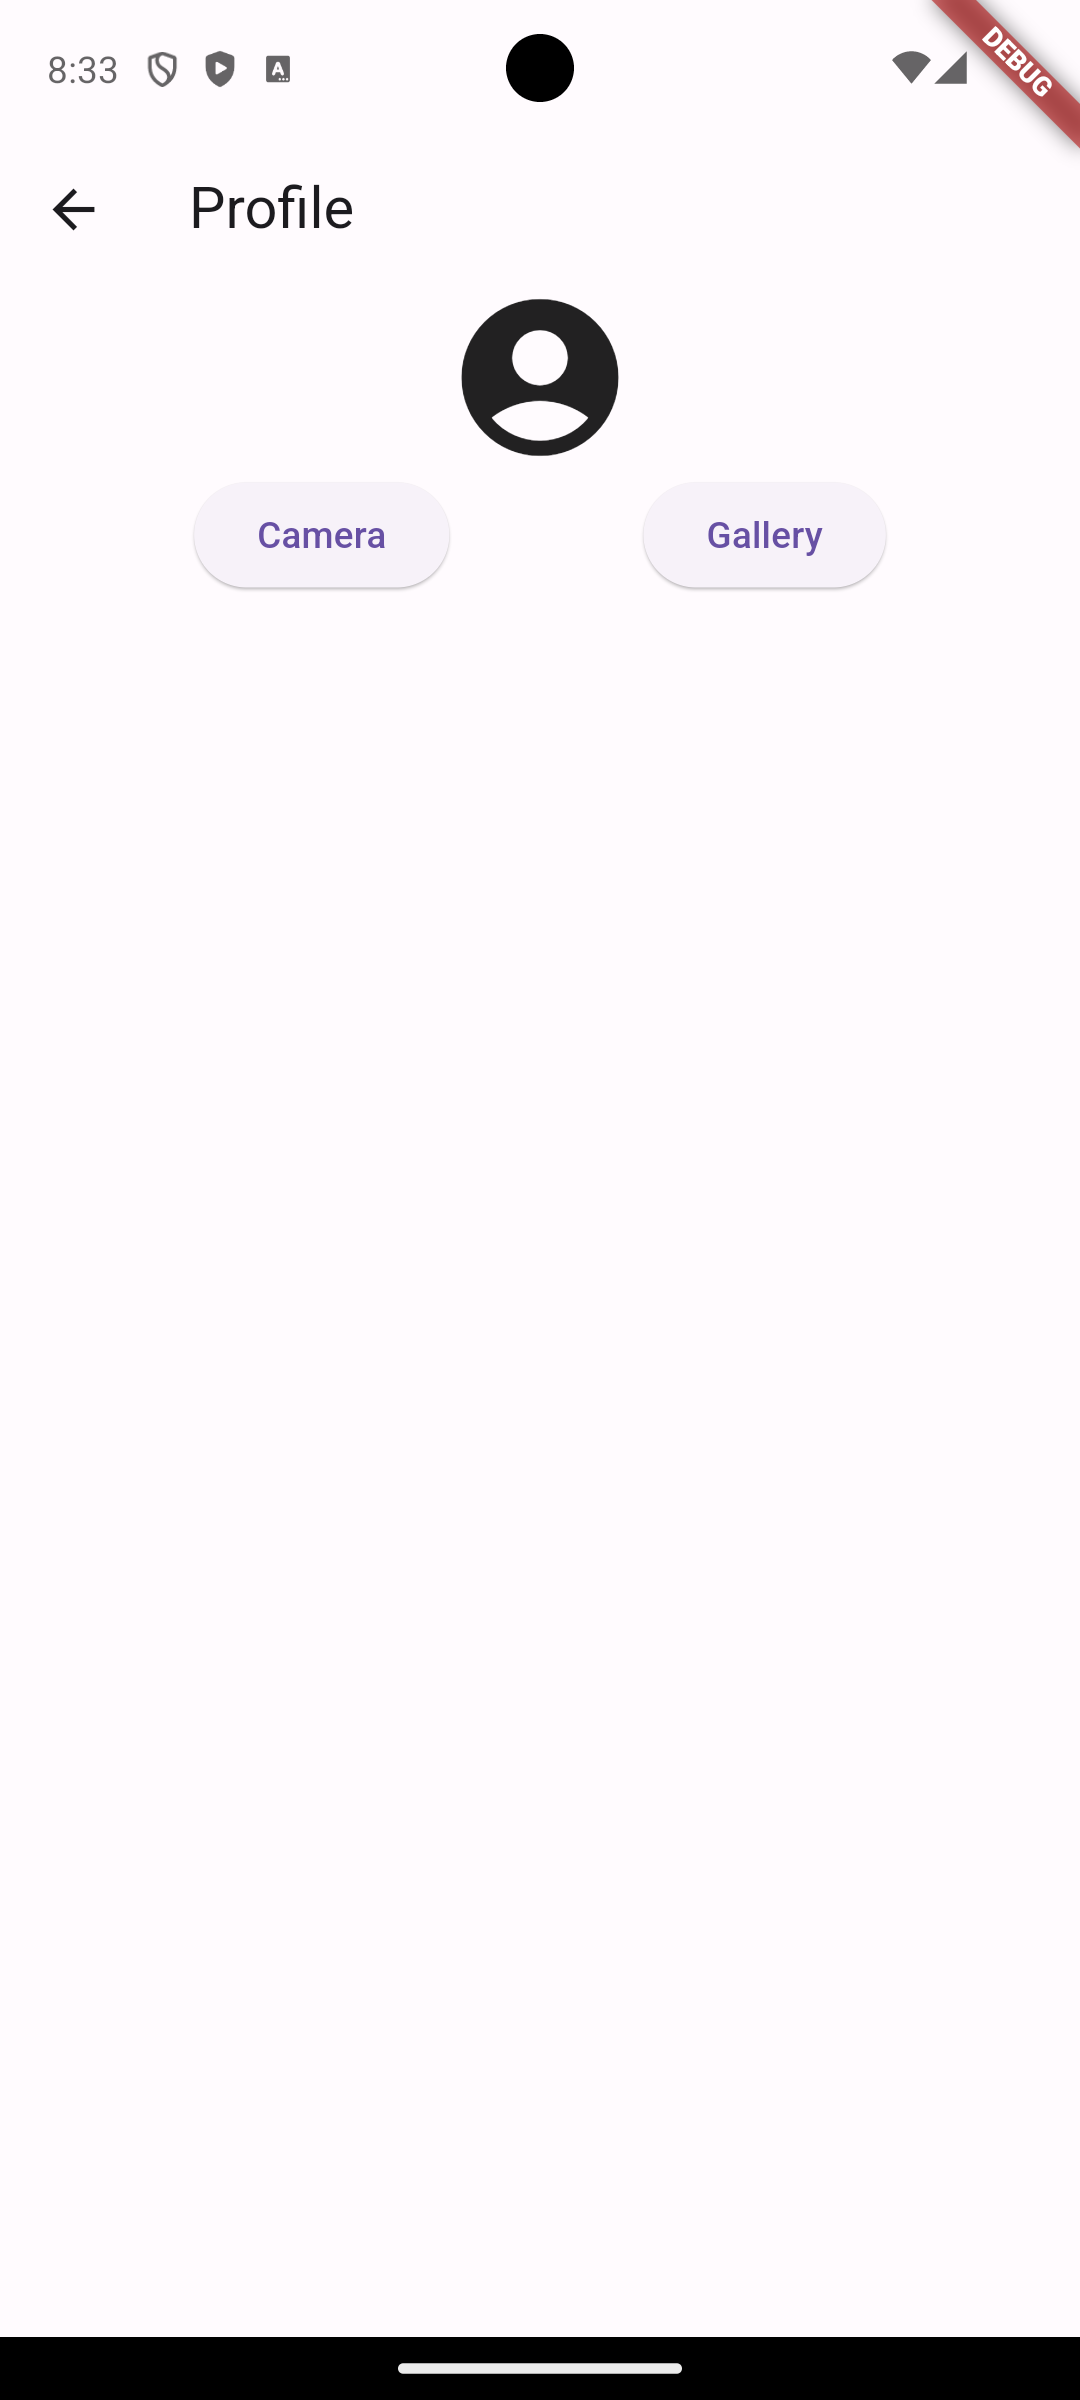
The idea of this screen is that the user can set a profile image. Right now, neither button works, and we are displaying a placeholder image to indicate that no profile image exists.
Note that ProfileScreen is a StatefulWidget, and that what it displays is based on the imageFile state variable. Let’s modify the code to use the image_picker library to allow the user to select a picture.
Important Note - May not work for web
The code I am about to show you regarding the Image Picker and Cloud Storage may not work using the web target. The reasons are that the browser may not have permission to access image files from arbitrary places on your computer. If you do want to try it with the web browser, you must run the program by typing flutter run --web-renderer html in the Terminal.
I strongly recommend that you use the emulator or a real device.
Accessing the Camera and Photo Gallery
When dealing with images in a mobile app, most apps allow you to choose to either take a picture using the camera or pick from the device’s photo gallery. Were you to deal with this in native code, the logic is actually quite complicated. You would have to request permission to access the user’s camera/gallery, deal with the user potentially saying “no”, hand-off control to the user’s Camera or Gallery app, get the image from the file, and then do something with the file. The process is incredibly cumbersome.
Fortunately, the Flutter team provides the image_picker library to make this easy for us. We already installed this when we modified pubspec.yaml, and the necessary import statement is already at the top of cloud_storage.dart.
Replace the contents of _ProfileScreenState with the following:
class _ProfileScreenState extends State<ProfileScreen> {
  // State variable that will refer to the profile image location.
  String? imageFile;

  @override
  Widget build(BuildContext context) {
    return Scaffold(
      appBar: AppBar(title: const Text("Profile")),
      body: Column(
        children: [
          // Display a placeholder or the selected image
          if (imageFile == null) const Icon(Icons.account_circle, size: 72),
          if (imageFile != null) Image.file(File(imageFile!), width: 250),
          Row(
            mainAxisAlignment: MainAxisAlignment.spaceEvenly,
            children: [
              ElevatedButton(
                  onPressed: () => _getImage(ImageSource.camera),
                  child: const Text("Camera")),
              ElevatedButton(
                  onPressed: () => _getImage(ImageSource.gallery),
                  child: const Text("Gallery")),
            ],
          )
        ],
      ),
    );
  }

  _getImage(ImageSource source) async {
    // Let the ImagePicker library to the heavy lifting.
    final ImagePicker picker = ImagePicker();
    final XFile? image = await picker.pickImage(source: source);

    // Trigger a rebuild of the widget to display the selected image (if any)
    setState(() {
      imageFile = image?.path;
    });
  }
}
A couple of things have changed:
- We introduce a
_getImage()method that is called based on which button was tapped. TheImageSourceis imported from theimage_pickerlibrary and can be eithercameraorgallery. _getImage()has to beasyncbecause of howImagePickerworks, and that’s why we have to split out the “image picking” into a separate method._getImage()calls setState() to trigger a rebuild of the widget- in the
build()method, we attempt to display an Image based onimageFile, which should be non-null if image picking was successful.
Try picking the “Camera” button. If you’re using an Android Emulator, the camera app will launch showing a fake image. That’s okay. Take the picture and then “accept” it by clicking the checkmark or similar icon.
When the ProfileScreen loads, you should see your picture. The Gallery button works similarly, but if you have no pictures on your device, there won’t be anything to select. To try it, go to the home screen in the device, find the camera app, take a picture, and save it. Then go back to your example project and try the Gallery option.
Saving and loading a profile image from Cloud Storage
Currently, the image we pick is only remembered temporarily. We now want to store the chosen profile image to the Cloud so that it will load every time the user logs in. Putting it in the cloud will also allow the profile image to be shared with other users and other devices.
First, add the following class variable to _ProfileScreenState:
// A reference to the Storage bucket for our project.
var storageRef = FirebaseStorage.instance.ref();
This creates a reference to your Storage bucket, much like you use a reference to Collection to interact with the Firestore.
Now, let’s change _getImage() to store the selected image file in the Storage bucket in the cloud. We need to specify the filename. I am going to user the currently-logged-in user’s UID as the filename. That way, I can easily identify a user’s profile picture file by leveraging FirebaseAuth.instance.currentUser!.uid as I did in the previous lab.
First, change the if(imageFile != null)... to
if (imageFile != null) Image.network(imageFile!, width: 250),
This tells the Image widget to load the file from the network (the Internet in this case) rather than a file on the device’s disk.
Next, change the _getImage() method to the following:
_getImage(ImageSource source) async {
final ImagePicker picker = ImagePicker();
final XFile? image = await picker.pickImage(source: source);
if (image != null) {
print(image.path);
// Extract the image file extension
String fileExtension = '';
int period = image.path.lastIndexOf('.');
if (period > -1) {
fileExtension = image.path.substring(period);
}
// Specify the bucket location so that it will be something like
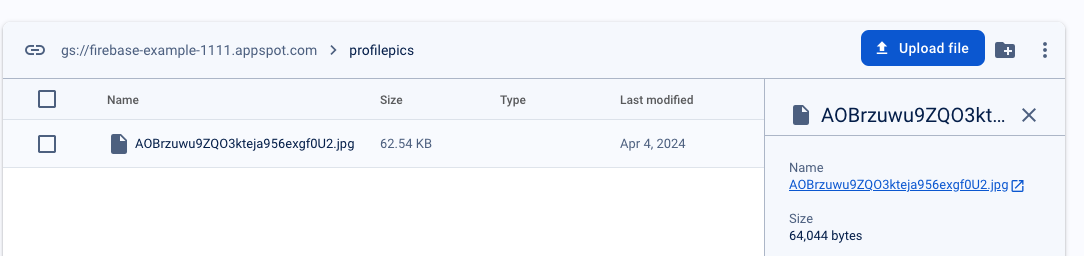
// `<ourBucket>/profilepics/AOBrzuwu9ZQO3kteja956exgf0U2.jpg`
final profileImageRef = storageRef.child(
"profilepics/${FirebaseAuth.instance.currentUser!.uid}$fileExtension");
try {
// Upload the image file.
await profileImageRef.putFile(File(image.path));
// Get a public URL that we can download the image from.
imageFile = await profileImageRef.getDownloadURL();
setState(() {});
// We should provide feedback to the user here.
print("Profile picture successfully saved!");
} on FirebaseException catch (e) {
// Caught an exception from Firebase.
print("Failed with error '${e.code}': ${e.message}");
}
}
}
- The resulting
imagefrom the picker has apathattribute that specifies the file location ON THE DEVICE where the image file is stored. This path is printed in your Debug Console. - the statement
storageRef.child(
        "profilepics/${FirebaseAuth.instance.currentUser!.uid}$fileExtension");
creates a reference to a file in our bucket, much like a Document reference in Firestore. In this case, we are referring to a file at, e.g.,<ourBucket>/profilepics/AOBrzuwu9ZQO3kteja956exgf0U2.jpg profileImageRef.getDownloadURL();gives us a URL that we can use with theImage.network(...)line so that the Image widget will download the new picture from the Internet.
You should now see the profile picture in the Storage console in the profilepics subdirectory. We don’t HAVE to put it in a subdirectory, but I do so just because.
Setting the profile image when ProfileScreen is loaded
If you reload the app or go to the HomeScreen and back, you will see our profile picture is not being loaded automatically. We need to tweak the ProfileScreen so that it attempts to load the profile image from Cloud Storage as when the widget loads.
Our ProfileScreen is a StatefulWidget. All StatefulWidgets inherit a method called initState (we encountered this in the PageView lab). We will add this method and an async helper here to attempt to load the profile picture when the ProfileScreen is loaded.
Place the following methods above the build() method in the _ProfileScreenState_:
  @override
  void initState() {
    super.initState();
    _getFileUrl();
  }

  void _getFileUrl() async {
    try {
      // We have to search all the files to see if the user
      // has a profile pic.
      ListResult result = await storageRef.child('profilepics').listAll();
      for (Reference ref in result.items) {
        print(ref.name);
        // Leverage our naming schema from _getImage()
        if (ref.name.startsWith("${FirebaseAuth.instance.currentUser!.uid}")) {
          imageFile = await ref.getDownloadURL();
          setState(() {});
        }
      }
    } on FirebaseException catch (e) {
      // Caught an exception from Firebase.
      print("Couldn't download profile pic for user.");
    }
  }
Voilà! The profile image loads. Note how we have to search the list of files to see if any of them match the currently-logged-in user’s UID. This is because we cannot anticipate the file extension of the image file. If we knew the extension, we could look it up directly.
Other storage use cases
here are many other strategies for using Cloud Storage. I went with the simplest here. These other options may work better for your project:
Using Firestore to remember Storage locations: It is very often the case that you may want to attach an image (or some other file) to data in Firestore. The simplest approach would be to add a field to the Firestore document named something like imageFile and put as it’s value something like /images/plant.jpg. Then, when you retrieve the Document from Firestore, you can get the imageFile field value and use that to build a call to cloud Storage, like storageRef.child(imageFile).
In our example app, perhaps if we had a Users collection in Firestore, we could make the profile picture location a field per User.
Storing multiple files for a user: Suppose you wanted to allow a user to upload multiple images to create a gallery. In this case, you could create a subdirectory using the currently-logged-in user’s UID as the subdirectory name. You could then place files inside that subdirectory. Each user then effectively has their own file folder in the cloud.
By the way, the image_picker library has support for choosing multiple files at once. You would have to write a loop to upload them individually.
Conclusion
This lab introduces you to Firebase Cloud Storage and how it can be used to store and retrieve image files. You can store ANY type of file in Cloud Storage. Just think of it as a file directory in the sky. But, you will need some way of storing or searching for the files you want to retrieve later, e.g., by keeping that information in the Firestore or using the user’s UID as an index for the files.