Cloud Firestore - Organizing Data and Search Queries
- Objectives
- Prerequisites
- Starter Files
- Introduction
- Changing the Person class
- Changing PeopleList
- Adding a Search Box
- Add a TextController and TextField
- Querying the Firestore
- Displaying results… or not
- A word on compound queries
- Completed code
- Conclusion
- More information
Objectives
- to show strategies for storing information on per user basis
- to implement a simple search box
Prerequisites
You must complete Cloud Firestore - Reading, Updating, and Deleting Data prior to this lab.
Starter Files
- main.dart - replace your
main.dartwith this one. - firestore_search.dart - place this in your
lib/folder
Introduction
In the previous lab, we created a list of fake artists and put a checkbox next to their name for a user to indicate that they had “visited” that artist’s masterwork. Our app currently has a People collection where this data is stored. Currently, the People collection is shared among ALL users of our app, so whenever one user says they have visited Pablo Picasso, ALL users see that Pablo Picasso has been visited. This doesn’t make sense, really. We want to check which masterworks have been visited on an individual basis.
The question we are asking is, “How do I track data in the Firestore on a per user basis?” The answer is, we accomplish this through how we organize the data. There are several viable approaches:
- We keep our People collection and add a second collection called Users. The Users collection is made of documents identified by Firebase Authentication id, and each user’s document contains a list of the People they have visited.
- We keep our People collection, and add a list of the Users who have visited to each Person document.
There is no simple answer. It really depends on how you plan to search the data you are storing. The official Firestore Documentation has some helpful videos and discussion that may help you determine the right answer. Honestly, trial and error and testing will help you figure out the most efficient way to store data until you become more experienced.
In our example app, I know from experience that it would be easier to keep a list of Users who have visited each Person inside that Person document. The changes to our StreamBuilder that displays the list of artists and whether or not they are visited would be minimal. I’m going to go with that approach.
However, this strategy does not scale well. If my app had a million users, then for every Person, I might be tracking a million user IDs on each document, which is both wasted space in Firestore and inefficient transmit between the cloud and the app. So, I really SHOULD have a separate Person and Users collection, but that would require me to move away from StreamBuilder and substantially rethink how displaying that list will go because I have to query two collections. For this course, we will go the more straightforward albeit inefficient route.
Changing the Person class
First, we’re going to change the Person class (which corresponds to an artist). We will change the visited boolean value to a variable named visitors that is a List of Strings. These Strings will correspond to the Firebase Authentication ids of users who mark the site as visited.
Change person.dart to the following:
import "dart:math";

class Person {
  Person(
      {required this.first,
      required this.last,
      required this.age,
      required this.visitors});

  final String first;
  final String last;
  int age;
  List<String> visitors;

  /// Static generate a random person object from a preset list of names.
  static Person getRandomPerson() {
    final List<String> firstNames = [
      'Leonardo',
      'Bob',
      'Raphael',
      'Filippo',
      'Pablo',
      'Rembrandt'
    ];

    final List<String> lastNames = [
      'da Vinci',
      'Ross',
      'Santi',
      'Brunelleschi',
      'Picasso',
      'van Rijn'
    ];

    final random = Random();
    var first = firstNames[random.nextInt(firstNames.length)];
    var last = lastNames[random.nextInt(lastNames.length)];
    var age = random.nextInt(100);

    // Note we initialize the visitors list to an empty list.
    return Person(first: first, last: last, age: age, visitors: []);
  }

  /// A utility method to convert our Person class into a Map
  /// with the same values. The Firestore library expects a Map.
  Map<String, Object?> toMap() {
    // The { } create a Map object, much like { } in Python creates a dictionary
    // This method creates and immediately returns the map.
    return {'first': first, 'last': last, 'age': age, 'visitors': visitors};
  }
}
Note the new List<String> visitors variable. Firestore documents can have fields of type array, which is analogous to a list. We also changed all references of visited to visitors. Note in the getRandomPerson() method how we initialize visitors to an empty list. We could initialize it to null, but then we’d have null checks. In programming in general, it’s better to provide a sensible default value for a field when you can.
Changing PeopleList
Now that our Person class has changed, we need to update our PeopleList widget to support tracking which Persons have been visited on a per user basis.
First, delete all Persons in your People collection either through the Firestore console or by clicking a Person in the app. The underlying data model changed, and dealing with outdated data from the Firestore can lead to crashes if we’re not careful.
Now, we’re going to edit our PeopleList widget. We will need to use the FirebaseAuth library from the Firebase Authentication in order to access data about the currently-logged in user. Add the following import to the top of firestore_add.dart.
import 'package:firebase_auth/firebase_auth.dart';
For now, comment out the trailing: property of the ListTile widget inside the ListView.builder() widget. This is where we make the decision to show a checkmark or an empty circle based on a Person document’s visited field. We got rid of that field and replaced it with visitors, so this logic is outdated.
Before we go displaying checkmarks, let’s update the onLongPress: property of the ListTile. Before, this property would simply toggle the boolean field visited when the user long-presses the tile. Now, we want to update the visitors property (which is a List) to either add or remove the currently-logged in user from the list.
Change the onLongPress: property to the following:
onLongPress: () {
  // Get a reference to the Document you want to update.
  QueryDocumentSnapshot person = personDocs[index];
  List<dynamic> visitors = person.get('visitors');

  // Remove the current user from the visitor list.
  // .remove() returns true if something was removed, and false
  // otherwise. We use this as an indicator of whether the current
  // user was in the list or not.
  if (!visitors.remove(FirebaseAuth.instance.currentUser!.uid)) {
    visitors.add(FirebaseAuth.instance.currentUser!.uid);
  }
  peopleRef.doc(person.id).update({"visitors": visitors});
},
Let’s breakdown the lines:
QueryDocumentSnapshot person = personDocs[index];: this gives the Firestore document’s data corresponding to the current list tile.List<dynamic> visitors = person.get('visitors');: Extract the list of visitors and assign it to a local variable. We know it is a list of strings, but we have to use thedynamickeyword (which basically means it can be anything) because the Firestore document doesn’t care what types are stored in the List.FirebaseAuth.instance.currentUser!.uid:FirebaseAuth.instance.currentUserreturns a User object that represents the User who logged in from our LoginScreen.currentUseris nullable, so we have to use the!to force a dereference.currentUsershould never be null here in our app because a user has to be logged in to get to this screen.- the
.uidgives the unique identify of the Firebase Authentication user. It a random string generated by Firebase Authentication. You can see it in the Authentication page of your Firebase Console:
- This UID gives us a way to track individual users of our app. We could also use the person’s
email. if (!visitors.remove(FirebaseAuth.instance.currentUser!.uid)) {...}: Thevisitorslocal variable is a list. In Dart, a List’s .remove() method removes the first occurrence of the target from the list. In this case, the target is the UID of the current user (a String). If the target is in the List,.remove()deletes the element and returns True. If the target is not in the List,.remove()makes no changes and returns False.- So, if the current user is in the visitors list,
.remove()will delete them and return True, so we know they are no longer in the list. - If the current user is not in the visitors list,
.remove()will return False, so we should add them to the visitors list because they’ve longPressed the tile. The if-statement then evaluates toif(!false)and executes the subsequent call tovisitors.add(...).
- So, if the current user is in the visitors list,
peopleRef.doc(person.id).update({"visitors": visitors});: we leverage theupdate()method described in the previous lab to replace the Person document’s oldvisitorsfield values with our updated list, which either has the current user added or removed.
This change to onLongPress will update a Person’s document the way we need. Now, we need to tweak the checkmark indicator in the ListTile with some new logic. Currently, it checks if the now defunct visited boolean is true or false. We need to change this to answer the question, “Is the currently-logged in user in the visitors property of the Person?”
Update the ListTile’s trailing: property to the following:
trailing: (personDocs[index]
        .get('visitors')
        .contains(FirebaseAuth.instance.currentUser!.uid))
    ? Icon(Icons.check_circle, color: Colors.green[700])
    : const Icon(Icons.circle_outlined),
We have changed the conditional check of this ternary statement (which is just shortcut for an if-else statement); The line personDocs[index].get('visitors').contains(FirebaseAuth.instance.currentUser!.uid) grabs visitors field for the current Person, then checks if the currently-logged in user’s id is in that list.
That’s it. We now have the “Visitors” for each person linked a list of user logins, and the users can add or remove themselves from the list by long-pressing on the ListTile.
Try creating multiple users for your app changing which artists they have marked as “Visited”. The list will update based on which user is logged in:
Adding a Search Box
Another common use case is to allow your users to query your data by keyword using a search box. Let’s add a new screen that allows our users to search for people by their first name.
Boilerplate
Create a new file in the lib/ directory called firestore_search.dart and paste in the following code:
import 'package:cloud_firestore/cloud_firestore.dart';
import 'package:flutter/material.dart';

class SearchScreen extends StatefulWidget {
  const SearchScreen({super.key});

  @override
  State<SearchScreen> createState() => _SearchScreenState();
}

class _SearchScreenState extends State<SearchScreen> {
  @override
  Widget build(BuildContext context) {
    return Scaffold(
      appBar: AppBar(title: const Text("Firestore Search")),
      body: Padding(
        padding: const EdgeInsets.all(8),
        child: Column(
          children: [
            const Placeholder(),
          ],
        ),
      ),
    );
  }
}
In main.dart, add the following import statement:
import 'firestore_search.dart';
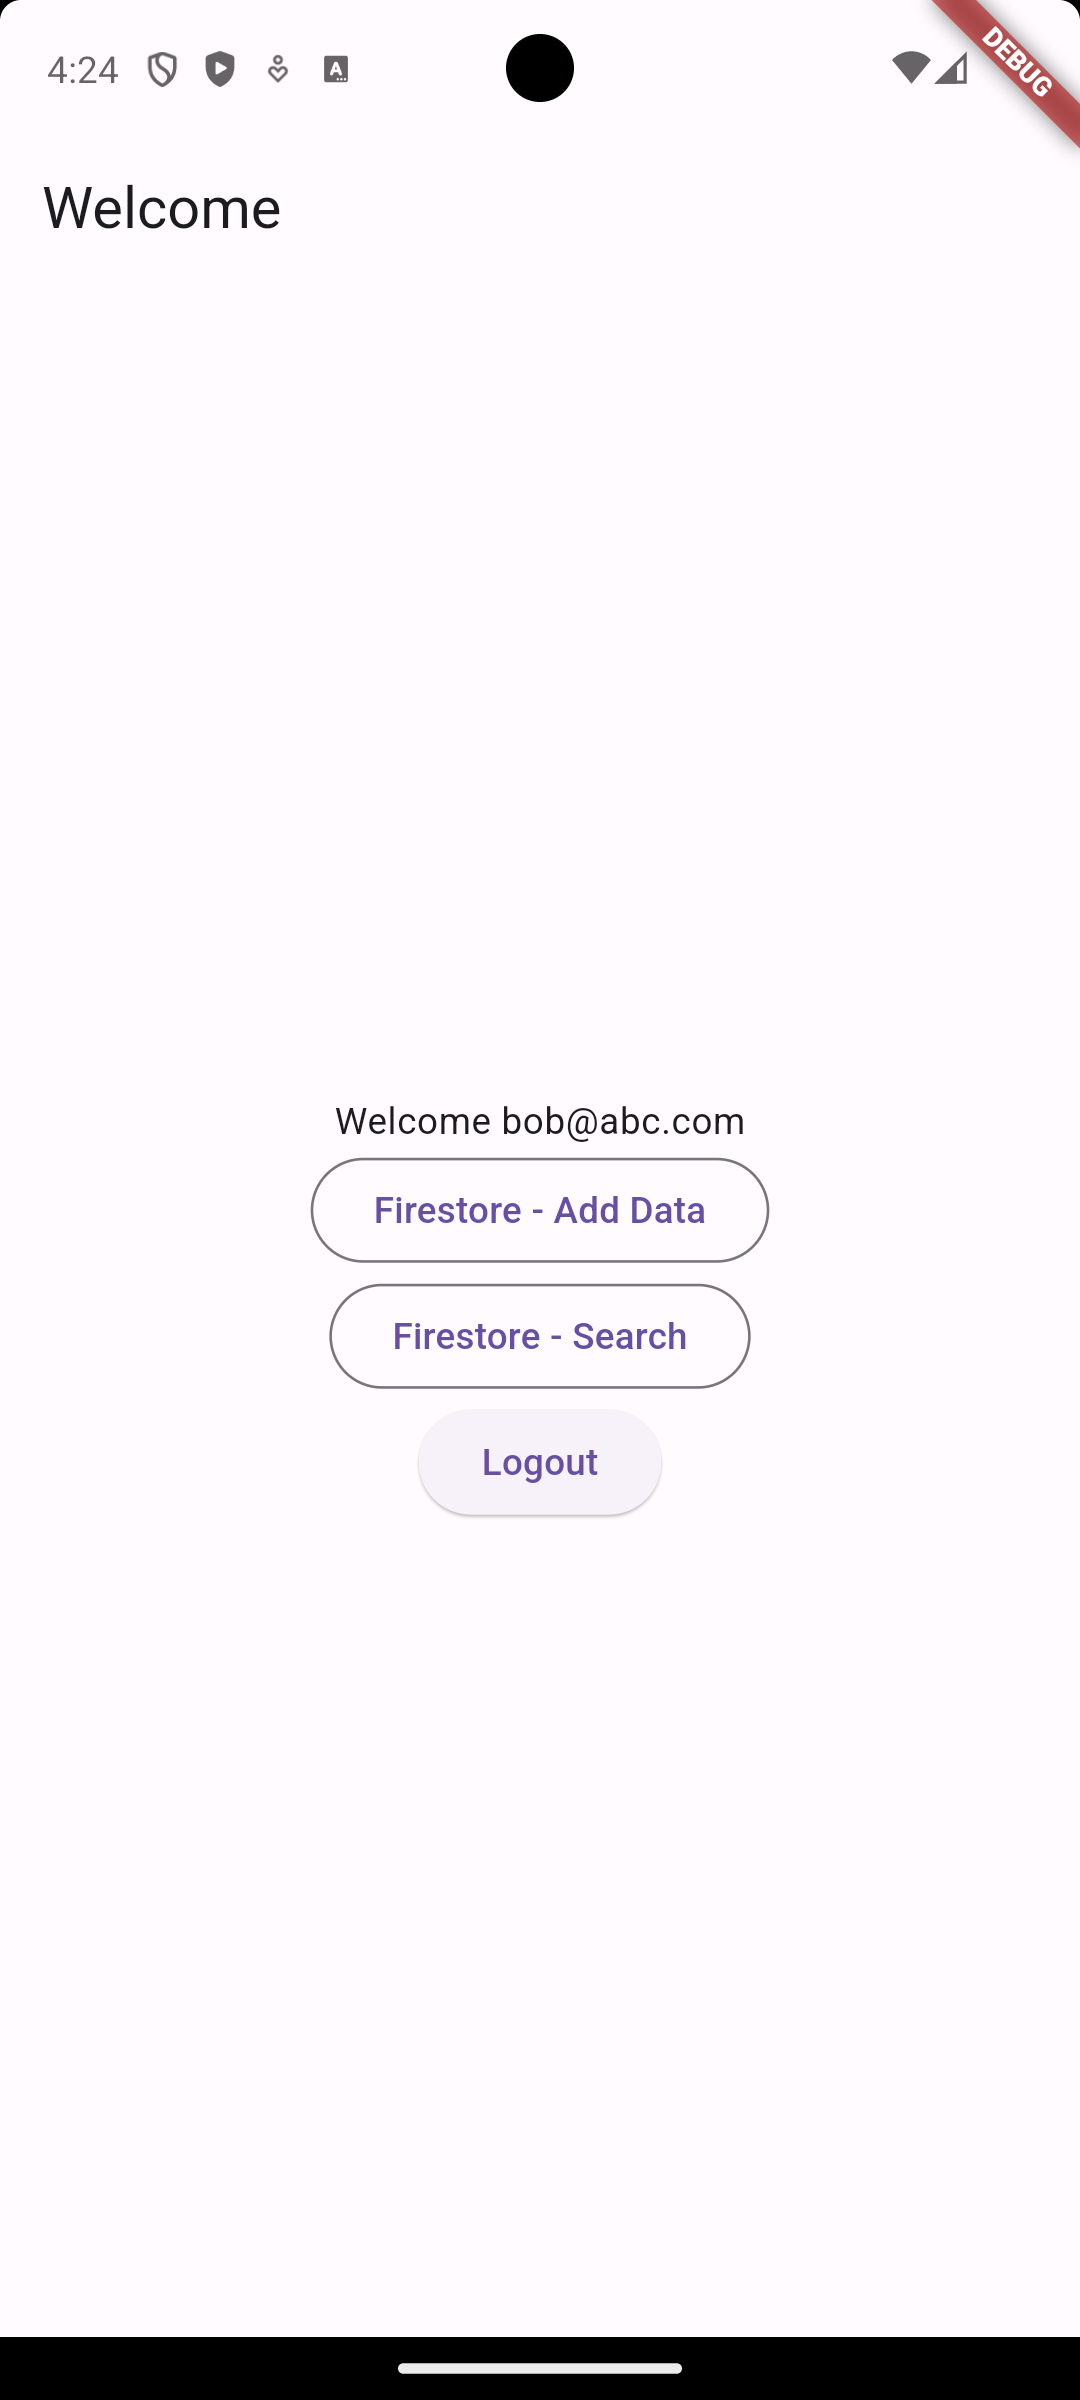
Then, add the following button to your HomeScreen widget:
OutlinedButton(
    onPressed: () => Navigator.push(
          context,
          MaterialPageRoute(
            builder: (context) => const SearchScreen(),
          ),
        ),
    child: const Text("Firestore - Search")),
Your Search screen should look like the following:
Add a TextController and TextField
Let’s add a TextField for the user to enter their search term. We will also need a TextController to allow us to access and control the data in this text field from anywhere in our class. We learned about TextFields and TextEditingControllers in the Forms lab.
Add the following TextController class variable to _SearchScreenState:
final TextEditingController _controller = TextEditingController();
When you have controllers in Flutter, it is always a good idea to “dispose” of them when your StatefulWidget is destroyed. To do that, you override the inherited dispose method in your State class, like so:
  @override
  void dispose() {
    _controller.dispose();
    super.dispose();
  }
Now, replace the PlaceHolder widget with the following TextField:
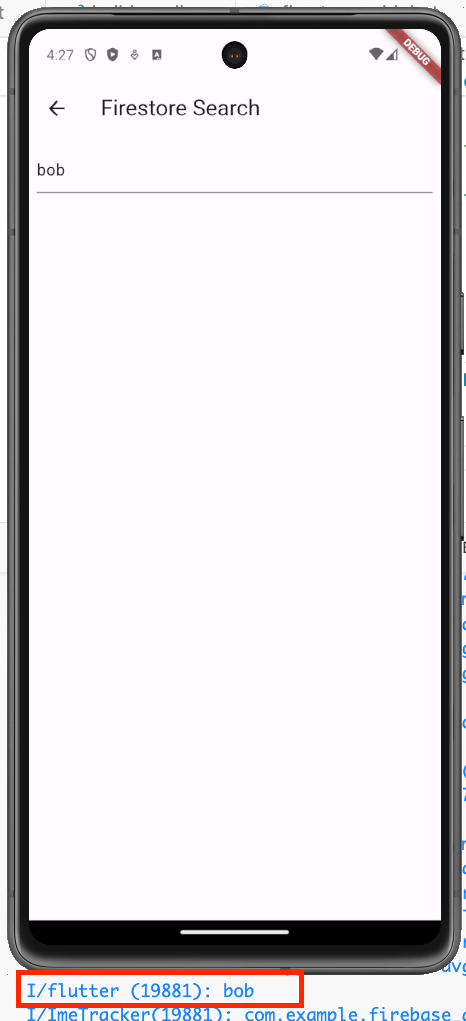
TextField(
  controller: _controller,
  decoration: const InputDecoration(hintText: "Enter a name"),
  onChanged: (value) {
    print(value);
  },
),
The TextField’s onChanged property fires every time the user types or deletes a character. Right now, all onChanged does is print the TextField’s current contents to the Debug Console, as seen below:
Querying the Firestore
Now we want to modify the onChanged property of the TextField such that it will query Firestore for the search term, retrieve the results, and display the results in a list.
First, we need to add two class variables to our State class:
  // Make sure import 'package:cloud_firestore/cloud_firestore.dart'; is imported
  final peopleRef = FirebaseFirestore.instance.collection("People");
  List<QueryDocumentSnapshot> searchResults = [];
peopleRefis similar to our other Firestore screens. It gives us a pointer to the “People” collection in the Firestore so that we can read and write data to that collection.searchResultsis a list where we will accumulate the list of people who match our search.
Now, let’s add our Firestore query to the TextField’s onChanged property:
TextField(
  controller: _controller,
  decoration: const InputDecoration(hintText: "Enter a name"),
  onChanged: (value) {
    print(value);

    // .where() specifies the query
    // you give where() field names
    peopleRef.where('first', isEqualTo: value).get().then(
      (result) {
        // Assign the documents that match our search terms
        // to our searchResults state variable.
        searchResults = result.docs;
        setState(() {});
      },
    );
  },
),
The query operation is peopleRef.where('first', isEqualTo: value). This says “I want all documents in the ‘People’ collection where the ‘first’ field equals the value in the TextField”. The isEqualTo parameter means to only get documents where the ‘first’ field is an exact match to value. Firestore does not provide partial string matching out of the box.
There are other operators, such as isNotEqualTo, isLessThan, isGreaterThan and more. You can find the full list and many examples in the official documentation.
The second component of the query is the get() operation. This is what actually makes the network call to the Firestore to get the data. We specify what to do with the results of the query in the .then() operation. The get() operation will yield a QuerySnapshot (a class containing Firestore data at the current point in time), and from that, we extract the list of documents representing our People, and set our searchResults state variable.
The final line of our onChanged is to call setState(), but right now we do not have any Widgets to display the results of our query (which could be no results). We can examine the searchResults variable to determine if there are results to show, but we should distinguish between “no results because the user hasn’t searched yet” and “no results because the search didn’t find anything”.
Displaying results… or not
So, how do we specify what Widget to show below the search box? In this case, we want to show three different Widgets based on the current state:
- the user hasn’t typed anything to search
- the user’s search didn’t return anything
- the user’s search did find something
When you’ve got complex logic that determines which Widget should be shown, a good strategy is to extract that logic into a method.
Create a method in the State class called _getBodyContent() with the following body:
  Widget _getBodyContent() {
    // 1. the user hasn't typed anything to search
    // 2. the user's search didn't return anything
    // 3. the user's search did find something
    if (_controller.text.isEmpty) {
      return const Text("Enter a search term to see results");
    }

    if (searchResults.isEmpty) {
      return const Text("Your search didn't match anything");
    }

    return ListView.builder(
      itemCount: searchResults.length,
      itemBuilder: (context, index) => ListTile(
        leading: const Icon(Icons.brush, size: 32),
        title: Text("${searchResults[index].get('first')}"),
        subtitle: Text("${searchResults[index].get('last')}"),
      ),
    );
  }
Notice that _getBodyContent() has a return type of Widget. This allows us to return any kind of Widget from the method, such as Text or a ListView. You can see in the logic above that we first look to see if the user has typed anything into the searchbox. If so, we see if there are any results. If so, we display the items. We also short circuit with a Text message if the user hasn’t typed anything or if the search results come back empty.
Finally, we need to call _getBodyContent() from our build() method so that its returned Widget is displayed. Add the following as the last child of the Column after the TextField:
Expanded(child: _getBodyContent())
Here is the result:
Notice how the search exact, including case-sensitive. This is because .where('first', isEqualTo: value) is an exact match. You can also see how the message distinguishes between “the user hasn’t typed anything” and “the search doesn’t match anything”.
A word on compound queries
In the previous example, we constructed a query for “first name is equal to X”. Firestore supports compound queries of the form “first name is equal to X AND age < Y”. Let’s illustrate briefly what that looks like by changing our query:
TextField(
  controller: _controller,
  decoration: const InputDecoration(hintText: "Enter a name"),
  onChanged: (value) {
    print(value);

    // .where() specifies the query
    // you give where() field names
    peopleRef
        .where('first', isEqualTo: value)
        .where('age', isLessThanOrEqualTo: 50)
        .get()
        .then(
      (result) {
        // Assign the documents that match our search terms
        // to our searchResults state variable.
        searchResults = result.docs;
        setState(() {});
      },
    );
  },
),
Notice how we have chained together the where() calls. This is how you create a compound query. I have hardcoded the value 50 here, but you could get this value from a different TextField or a number picker. You can learn much more about compound queries from the official documentation.
When you perform the search in the app, you will get an exception thrown and an error printed in the Debug Console:

Querying options for the Firestore
The main error is The query requires an index. You can create it here: ... followed by a very long URL. Click that URL or copy and paste it in your browser. It will create an index in the Firestore on those two fields. An index is a database concept wherein the database creates an internal data structure that dramatically improves searching on certain fields at the expense of extra storage used. Firestore requires that you create an index on fields that you perform compound searches on.
Again, click the link in the error message or paste the URL into the browser. It will take you to the Firestore console’s “Indexes” tab and the following pop-up:

Click the “Create index” button and let it run. You will be shown a summary screen where your new index has the Status of “Building…” This will take a few minutes. Once it is finished, go back to your app, and the search of first name + age will now be working.
Completed code
Conclusion
The Firestore has some basic searching capabilities that are excellent for filtering data and basic querying. It is not, however, as full-featured as a relational database like MySQL. Before you implement the Firestore as the database in your own projects, you should think deeply about the data structure as it will drive and limit your implementation.
If you are in need of a relational database, you will need to turn elsewhere, such as Google Cloud SQL, Amazon RDS, or Azure SQL Database.
More information
- Querying optiong: https://firebase.google.com/docs/firestore/query-data/queries